Pages

Monday, March 31, 2014

Chile Cheese Cornbread in a Skillet


Where's my appetite? It's gone... lost, misplaced, ignored or something. Lately I haven't cared to cook or eat much, and that feels strange. This morning a few guilt pangs propelled me into the kitchen so our breakfast might be something other than the usual smoothie or a bowl of oatmeal. 

  
There I was, hanging out in the kitchen, halfway tuned in to the television chatting away in the background, wondering what to do next? "BACON!" caught my attention, an entire program dedicated to some host's bucket list of bacon dishes. Bacon? no way, not today, not a sensible post-op breakfast choice and it truly had lost it's appeal -- omigosh, that's unusual for this bacon-loving cook!

Quick bread, specifically cornbread, popped into my mind as an easy-to-make, quick-to-bake breakfast item. The longer I thought about it, the better it sounded. Add a few favorite ingredients for flavor, some sour cream to keep it moist, and this could be a winner. How could it miss with corn kernels, chipotle-based chile powder, pepper jack cheese and canned chiles in the mix?


Today's cornbread was unexpectedly tender-crumbed and moist (always a good thing for cornbread), with mild chile-flavored heat and a nice toothy bite from the whole corn. RL requested more chile heat for the next batch, not an usual request from him but surprising since he hasn't cared much for cornbread in the past. I think we have a winner here. 

I ate my wedge with a light slather of butter and RL topped his first slice with hot pepper jelly and his second with orange marmalade plus a few splashes of green tabasco. Mmmmm, good. Any leftover cornbread would be delicious accompanying soup or used as a base for a hot, roasted sweet pepper sandwich. 

Now about that bacon - I served RL several sizzling strips while I enjoyed the aroma without any temptation to eat some... nope, not even one piece. No doubt a strange but temporary condition.


Moist Chile Cheese Cornbread
Oven-Baked in a Cast Iron Skillet

Dry ingredients:
1 cup finely ground cornmeal (yellow or white)
1 cup AP flour
1 1/2  teaspoons baking powder
1.2 teaspoon baking soda
2 Tablespoons granulated sugar
1/2 teaspoon salt
1 teaspoon chile powder (Penzey's Chili 3000)

Wet ingredients:
2 large eggs
1/2 cup sour cream
1 can Nestle Media Crema (table cream)
6 Tablespoons (3/4 cube) butter, melted, divided
2/3 cup corn (thawed & drained if using frozen)
2/3 cup PepperJack cheese, grated
1 can diced chiles, drained

  1. Place an oven rack in the center position and preheat the oven to 400 degrees F. Butter the sides and bottom of a cast iron skillet, 10-inch preferred.
  2. In a large bowl whisk together the dry ingredients. 
  3. Use a medium bowl and whisk together the wet ingredients using only 4 tablespoons of the melted butter (reserve the remaining 2 tablespoons for later).
  4. Add the wet mixture to the dry mixture and stir with a large spoon or spatula until just combined. Do not over mix.
  5. Heat the buttered skillet (briefly in the preheated oven or on stovetop over medium heat). Pour the batter into the skillet, leveling somewhat to avoid a mounded middle.
  6. Bake in the middle of the preheated oven for 10 minutes. Remove from the oven and drizzle the remaining 2 tablespoons melted butter over the top. 
  7. Return to the oven and bake until golden brown and a cake tester or toothpick comes out clean, roughly 10-15 minutes. Cool for 5-10 minutes on a baking rack to let the center set up. Cut into wedges or squares and serve plain or with desired toppings. 

Tuesday, March 25, 2014

Chorizo Poblano Quesadillas with Lime Sriracha Slaw


This combination of flavors was over-the-top delicious, a guaranteed two-thumbs-up hit with that combination of ingredients. It was mid-week, the refrigerator held a variety of produce, an impressive collection of condiments in bottles, and a few other assorted ingredients, but I had no idea of what to make for lunch. 


When in doubt, it's easy to make a large entree salad or whip up something to fill a tortilla. I went the tortilla route. Red cabbage, poblano peppers and spring onions combined with a spicy, citrusy mayo-based sauce for a peppy coleslaw. RL did so many enthusiastic taste tests of the slaw that I had to banish him from the working side of the island... "Step away from the bowl!"


Chorizo, more poblano peppers and a hint of chipotle pepper created a filling that brought the taste buds to attention... in a good way. We both love spicy heat but I don't want to kill off any taste buds along the way.


Warm a tortilla enough so it won't crack when folded; cover half with layers of slaw, chorizo filling, grated cheese and fresh vegetables; fold and heat on both sides in a dry skillet until lightly browned and presto! you've got a great what-to-eat-for-lunch solution. 


Chorizo Poblano Quesadillas with Lime Sriracha Slaw
serves 2 to 4, depending on appetite size

For the slaw:
4 cups thinly sliced red cabbage
2 Mexican grilling (fat green) onions, thinly sliced
1/2 poblano chili pepper, deseeded & julienned
1/4 cup Best Foods Mayonnaise (RL prefers Miracle Whip!)
2 Tablespoons fresh lime juice
2 Tablespoons seasoned rice vinegar
1 Tablespoon Sriracha (more or less to taste)
  1. Mix together mayonnaise, lime juice, vinegar and sriracha in a mixing bowl. 
  2. Add the cabbage, onions and poblano and toss to mix thoroughly. Set aside to let stand for ten minutes or more while you prepare the chorizo mix.
For the Chorizo filling:
3 chorizo links (I used Falls Brand precooked Basque chorizo)
1/2 poblano chili pepper, deseeded & julienned
1 small white onion, diced 
1 Tablespoon oil (if using precooked chorizo)
1 teaspoon ground chipotle chili pepper
1 Tablespoon dried cilantro
  1. Heat the oil in a medium sauté pan over medium heat. Remove the casings from the chorizo links.
  2. Crumble the chorizo into the heated pan; add the remaining ingredients and cook over medium heat until the vegetables are softened and the meat is heated through. (If using uncooked chorizo, drain off the fat after the meat is fully cooked.) 
  3. Taste and adjust seasonings (add salt & pepper if you wish). Cover and keep warm while you heat the tortillas.
For the quesadilla:
4 large flour tortillas
2-3 fat radishes, thinly sliced
1 large Roma tomato, chopped
1/2 cup Cotija cheese, crumbled
fresh cilantro, rough chopped (optional)
sour cream, guacamole or diced avocado (optional)
  1. Use a nonstick skillet over medium heat and heat a tortilla on one side until warm, but not crisp. Remove to a plate while you heat a second tortilla.
  2. Layer half of each tortilla, warmed side up, with cheese, chorizo filling, radish slices, tomato chunks, cilantro and more cheese. Fold the open half of each tortilla over the filling and press down firmly to slightly compress the filling slightly (but not hard enough to split the tortilla along the fold).
  3. Place the 2 folded tortillas back in the heated, nonstick skillet, side by side. Heat, turning carefully once with a spatula, until each side is browned and beginning to crisp.
  4. Cut in half (optional) and serve immediately.

Notes: 
     I love to top quesadillas with a dollop of sour cream and a scattering of avocado chunks; RL prefers his without extra toppings.
     I cut my quesadilla in half and eat it with my fingers like a sandwich. RL opens his up, redistributes the filling, usually adds some taco sauce, and eats his with knife and fork (see above photo).
     What's your quesadilla style?
  

Thursday, March 20, 2014

Sourdough Soda Bread Biscuits...

...with orange zest, currants and a slight Sourdough twist. 


Soda Bread was the March project for Sourdough Surprises, a fun monthly group of bakers who strive to use sourdough starters for things besides bread. Since soda bread typically relies on baking soda for its rise rather than yeast, the added sourdough comes along for the ride as a flavoring ingredient only. In decades past my early attempts to make soda bread yielded bland, dense, dry loaves suitable for doorstops or boat anchors. I moved on to other loaves and never looked back, until this month's challenge put soda bread back on the menu.

An online search provided a gazillion choices (okay, over a quarter million). I selected a basic, non-sourdough recipe with few ingredients, then changed it... adjusted the flour and buttermilk quantities to account for some added sourdough starter... omitted the recommended caraway seeds... added orange zest to pop the flavor... and carried on with high hopes but low expectations. Small biscuits or loaves sounded somehow less risky than a full-blown loaf, less likely to break a toe if dropped, etc. 


Well hot damn, those little biscuits were delicious! They were moist, loose crumbed but not crumbly, and the orange zest and sourdough took the flavor w-a-y beyond bland. Why did I give up on soda bread so easily those many years ago?! 


Our St. Patrick's Day celebration menu featured Corned Beef baked with a mustard/orange marmalade glaze, Colcannon with Kale, Orange-sauced Carrots, Shamrock Cookies delivered by a local leprechaun, and surprisingly good Sourdough Soda Bread Biscuits. We all agreed, we shouldn't wait for the next St. Patrick's day to roll around in order to enjoy these biscuits again. 


Soda Bread Biscuits
based on a recipe from Food Network Magazine
yield: eight 3-inch biscuits

Prep Time:  10 minutes
Cook Time: 20 minutes
Dry ingredients:
1 3/4 cups AP flour
2 teaspoons sugar
3/4 teaspoons baking soda
1/2 teaspoon salt

Wet ingredients:
2 tablespoons cold butter, diced
1/2 cup currants or raising
zest of 1 orange
1/2 cup buttermilk (or 1/2 cup milk + 1 Tablespoon white vinegar)
1/2 cup sourdough starter

  1. Preheat the oven to 375 degrees F.
  2. Add the dry ingredients to the bowl of a food processor. Pulse a time or two to mix.
  3. Add the diced bits of cold butter to the bowl and pulse several times to incorporate.
  4. Add the raisins, fresh orange zest, buttermilk and sourdough starter to the bowl; pulse off and on until the dough comes together and begins to form a ball. 
  5. Don't get carried away and over pulse on any of the above steps - the dough is meant to be a bit wet, shaggy and sticky.
  6. Put the dough onto a lightly floured surface and pat it out evenly until it's about 1-inch thick. Use a floured biscuit cutter or a knife to cut it into 2 1/2 to 3-inch rounds.
  7. Place on a (silpat-covered) cookie sheet and bake at 375 degrees F for 15 to 20 minutes or until lightly browned.
  8. Best eaten warm the same day baked, or reheated in a bun steamer. Soda bread is not noted for it's keeping quality.


Sunday, March 16, 2014

Broccoli Beef with Mushrooms and Oyster Sauce


My earliest memory of Chinese food was my mother's mid-century version of Chop Suey, a dish not authentically Asian but certainly exotic compared to our standard family fare. Cans of Chun King noodles and bean sprouts might have been part of the mix... I've never requested her old recipe though it's probably stored in her kitchen, recorded on a 3x5 card in a battered file box.

Early married dining out memories include steaming bowls of Cashew Chicken, Chow Mein and Broccoli Beef served up at various Chinese restaurants around the Eastside. Then we ventured down the hot and spicy road to Szechuan dishes, savoring the flavors of Kung Pao Chicken, Hot and Sour Soup, and the like. Seattle's ever-growing wealth of Asian restaurants beckoned and it didn't take long to branch out and embrace Korean, Japanese, Thai and Pan-Asian Fusion cuisines.  


Today, for no particular reason, that old favorite Broccoli Beef came to mind as I planned the week's menus. Fridge and pantry held the necessary components but an updated recipe was elusive. I adjusted ingredients and combined techniques from a variety of print and on-line sources to come up with the recipe below. 


Success! We enjoyed the dish, though next time I will use less beef and more broccoli, perhaps add a handful of water chestnuts to increase the crunch factor. All in all, the taste compared well with the food memory and it was fun revisiting an old favorite.


Beef, Broccoli and Mushroom Stir Fry with Oyster Sauce
Serves 4 

For the beef & marinade:
         1 lb. flank steak or sirloin
         1 Tbs. cornstarch
         1/4 tsp. sugar
         1/8 tsp. baking soda
         2 Tbs. Chinese rice wine 
For the sauce:
         2 Tbs. oyster sauce
         2 Tbs. soy sauce 
         1 tsp. peanut oil (or sesame oil)
         1 tsp. cornstarch
         1/8 tsp. white pepper
         2 Tbs. Chinese rice wine
For the stir fry:
         2 cups small broccoli, florets & thinly sliced stalks
         3 Tbs. peanut oil (or other high-heat cooking oil), separated
         2 garlic cloves, whole but smashed with the side of a knife
         2 slices fresh ginger, smashed with the side of a
  knife
         1 small yellow onion, cut into 1-inch dice
         1 Tbs. Chinese rice wine 
  1 cup mushrooms, quartered or cut in thick slices
 Sesame seeds for topping (optional)

Directions:
Marinate the beef: Slice the beef thinly across the grain into strips 3" x 1/4". Stir together cornstarch, sugar, baking soda and 2 Tbs. water in a medium bowl. Add the beef and stir until coated. Rest at room temperature for 20 minutes.


Mix the sauce: Combine the sauce ingredients in a small bowl; mix well and set aside.

Blanch the broccoli: add the broccoli florets and stem pieces to a pan of boiling water and blanch until barely tender, 2 to 3 minutes. Drain, rinse under running cold water until cool; drain again thoroughly. Set aside.

Remove the beef from the bowl, pat dry with paper towels. Heat a large, deep sauté pan over high heat until very hot, add 2 Tbs. of the peanut oil and swirl to coat. Add beef and spread out into a single layer so the pieces don't touch. Stir-fry the first side undisturbed until it's just opaque, about 1 minute; flip and continue to cook until no longer pink, about 2 minutes. Lift the beef with a slotted spoon, place in a sieve placed over a bowl to drain.

Wipe pan with paper towels and reheat over high heat. Add 1 Tbs. oil and swirl to coat. Add garlic and ginger, stir-fry just until light golden brown, 15 to 20 seconds. With slotted spoon, remove garlic and ginger, discard. Add onion and mushrooms to pan, stir-fry until just tender, about 2 to 3 minutes.

Pour in the rice wine and deglaze the pan, stirring to scrape up any browned bits from the pan bottom. When the wine has evaporated, add the sauce, stir and bring to a boil. Immediately add the cooked beef, broccoli and stir-fry until the sauce boils and thickens and the beef is heated through. Transfer to a warmed bowl, top with sesame seeds if using, and serve with rice or noodles.


Friday, March 14, 2014

To Keep a Cut Avocado Fresh...

 ...here's a quick Friday food tip, found online today.


How do you handle the unused half of an avocado to store it to use another day, keeping it's surface firm and green instead of slimy and brown? I've fought this battle for years decades, without great success, usually resorting to a quick bit of guacamole. Today I found a possible solution online at theKitchn, along with a handful of other avocado tips. Store a cut half, with pit and skin, in an airtight container with a slice of onion. Sulfur off-gassed from the onion may retard the oxidation/spoilage of the exposed avocado. Check out the original post at theKitchn, it seems worth a try. 


The Best Way to Keep Cut Avocado Fresh
TIPS FROM THE KITCHN


Have you ever tried the onion approach? I'm ready to experiment today - what a great excuse to enjoy an avocado and sardine sandwich for lunch. Don't wrinkle up your nose, it's unusual but tasty, healthy and filling. (RL just voiced a dissenting opinion regarding "tasty".)

Sunday, March 9, 2014

Cheery Cherry & Chocolate Oatmeal Cookies


It's hard to beat the original recipe for oatmeal cookies. You know the one, the recipe printed on the Quaker Oats box. There's a reason that recipe still appears on the iconic, tubular container - it's darned good! Nonetheless, a recipe's honored, classic status doesn't mean it can't be tweaked a little, added to and messed with, just for fun. 

These cookies were baked to share with the guys working on the construction project at the house. Shipyard workers have enjoyed my home-baked cookies, so why not a construction crew? This batch of oatmeal cookies incorporated dried cherries and white chocolate chips for an unexpected taste treat. Good decision! While these may not have been the prettiest cookies ever seen in my kitchen, they were delicious and well-received by the crew. It's a good sign when not even a crumb remains on the platter. Now I'd better come up with another cookie inspiration for next week.


A cookie scoop helps to shape cookies of uniform size, and to keep your fingers from turning into sticky blobs... unless you need an excuse to nibble raw cookie dough.  

Cookies on the left were dropped from a cookie scoop and baked, the ones on the right were flattened with a fork prior to baking. The taste and texture remained the same, only the appearance was altered.


Cheery Cherry & Chocolate Oatmeal Cookies
based on the classic Quaker Oats recipe 
Yield: approx 3 1/2 dozen

1/2 pound (2 sticks) unsalted butter, softened
1 cup firmly packed dark brown sugar
1/2 cup granulated sugar
2 eggs
1/2 teaspoon vanilla
1/2 teaspoon almond extract
1-1/2 cups all-purpose flour
1 teaspoon baking soda
1 teaspoon ground cinnamon
1/2 teaspoon salt
3 cups rolled oats (not instant)
1 cup dried cherries (or cranberries)
1 cup white chocolate chips
  1. Preheat the oven to 350°F.
  2. Use a large bowl and beat butter and both sugars until creamy (you can do this by hand but a stand mixer makes it much easier). 
  3. Add eggs and vanilla and mix to thoroughly incorporate. 
  4. Sift together the flour, baking soda, cinnamon and salt; add to the butter mix and combine well. 
  5. Add oats, cherries and chips; stir in to mix well.
  6. Use a cookie scoop to form balls or drop dough by generous, rounded tablespoonfuls onto ungreased or silpat-covered cookie sheets.
  7. Bake 10 to 12 minutes or until light golden brown. Take care not to over bake to medium-brown or the cookies will be too dry when cooled.
  8. Let the cookies rest for a few minutes on the cookie sheets to firm up a bit, then use a flat spatula to remove to a wire rack. Cool completely before storing, tightly covered. The cookies will keep for several days and are reported to freeze well (but they never last long enough to freeze in my kitchen or galley!)

Thursday, March 6, 2014

Shamrock Schnapps Bundt Cake


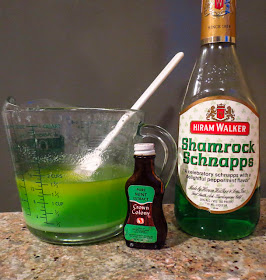
March is full of Irish and pseudo-Irish icons, an abundance of shamrocks, shillelaghs, leprechauns with pots of gold, penny whistles, even green beer. Green beer? Ugh, that does not sound appealing, not even a little bit, not even to celebrate St. Patrick's Day. Ah, but green Schnapps is something else again. The bottle's label reads Shamrock Schnapps but the reality is it's green-colored peppermint Schnapps. Colored or not, it is a delicious beverage and even a sip tastes like a party in your mouth. 


"Slainte!"
Shamrock Schnapps was a perfect choice to flavor a bundt cake in honor of the annual March 17 event. A trial run was definitely called for, bring on the Shamrock Bundt Cake! 


Mint extract could substitute for the schnapps... I suppose.
The bottled liquid was notable for it's vivid greenness and the strong, heavy scent of mint assaulting the senses. Used as an ingredient the brilliant emerald green color faded away and the aroma was tamed, but the flavor asserted its presence in the baked cake as well as in the thin finishing glaze. So, taste... analyze ingredient mix... taste again... assess color and texture... taste again... add some whipped cream... repeat process. Yum, we just kept on tasting. The Shamrock Schnapps added an amazing flavor boost to this ordinary bundt cake, a two-thumbs-up winner.


The sample cake was so delicious it nearly disappeared, poof!, before I could wait for daylight and play around with assorted props for some festive shots. I could have baked a second test cake just for photos, perhaps used a chocolate cake mix for a different effect, but truly my waistline doesn't need another sample. Ah, but the taste... hmmmmm, maybe a few little mini cakes to shoot and then freeze immediately. Or I could be patient and wait until St. Patrick's Day... or maybe not.   

Shamrock Schnapps Bundt Cake

1 box cake mix (I used yellow only because I had it stocked)
3-ounce package instant no-cook pudding (I used vanilla)
1/2 cup oil
1/2 cup Shamrock Schnaps
1/2 cup water
4 eggs

Mix all ingredient together, pour into a prepared pan and bake in a preheated oven as directed on cake package for tube pan or bundt cake.

Glaze
1/2 cup butter
1/4 cup water
1 cup sugar
1/2 cup Shamrock Schnapps


Bring butter, water and sugar to boil. Remove from heat to add Schnapps (it's a safety issue). Pour the glaze over cake while it's still warm from the oven; spoon about half over the cake while still rests in pan. Then invert the cake onto a large, flat plate and add the rest of the glaze.