Sunday, December 10, 2017

Minestrone, a Hearty Winter Warm Up


2017 Minestrone
My hunt for a seriously good minestrone recipe continues, both in casual dining restaurants and in my own kitchen at home. Some days inspiration comes from colorful Pinterest photos or intriguing cookbook recipes, or more often develops as a random, freeform exploration featuring seasonal produce in the fridge. This week's version, an adaptation of Ina Garten's Hearty Winter Minestrone, was declared a success. Not surprising since Ina's recipes rarely disappoint. You'll find her original recipe online here and in her 2012 cookbook Barefoot Contessa Foolproof.

I took some liberties with the ingredient list, added a few vegetables and omitted others, changed the pasta, used leftover prosecco rather than white wine... and it was still delicious. Adaptability is what makes minestrone such an amazing soup, but don't just take my word for it.
"If all were right in the world, there would be as many recipes for minestrone - the Italian soup of simmered vegetables and beans- as there have been individual pots of it cooked. That's because it's really more of a process than a fixed recipe." J. Kenji Lopez-Alt
Read more of Kenji's lengthy but interesting Food Lab treatise on minestrone here for some history, basic technique, ingredient suggestions, and a kettleful of researched fact and opinion.


My previous minestrone soups varied widely in flavor and ingredients, some more successful than others, and have combined fresh, frozen and boxed or canned ingredients. Perhaps incorporating dried beans and their cooking liquid will boost the next  kettle of soup to the next level of layered flavors. For now, I'm happy to work with this recipe again. Thanks for the inspiration, Ina, and thanks, Kenji for the encouragement to stray from a written recipe.


2015 Minestrone
2013 Minestrone
2012 Minestrone
2011 Minestrone 
2010 Minestrone


A 2017 Winter Minestrone

from an Ina Garten recipe
serves 6 to 8

Ingredients
2 Tablespoons olive oil
4 strips of thick-sliced bacon, chopped
1 large yellow onion, chopped
2 cups carrots, chopped
4 large stalks celery, chopped
1 sweet pepper, chopped (I used a poblano instead)
2 Tablespoons garlic, peeled & chopped
2 teaspoons Italian herb mix (Penzeys)
1 heaping teaspoon dried basil
2 15-ounce cans diced tomatoes with juice
8 cups low-sodium chicken stock, divided
1 bay leaf
salt and pepper, to taste
1 can small white beans, drained & rinsed
2 cups cabbage, chopped (I used Napa)
1 medium zucchini, chopped
1 cup green beans, chopped (I used frozen)
4 cups fresh baby spinach, loosely packed
1/2 cup white wine (I used prosecco, because it was open)
2 cups cooked small pasta, tubes or small shells
Freshly grated Parmesan cheese, &/or a gremolata mix of parsley, garlic and lemon zest for serving

Directions
1. Use a large, heavy-bottomed pot or Dutch oven and heat the olive oil over medium heat. Add bacon and cook until lightly browned but not crisp. 

2. Add the onion, carrots, celery, pepper, garlic, Italian herbs and basil to the pot and cook until the vegetables begin to soften.

3. Add tomatoes with their juices, 6 cups of chicken stock and the bay leaf. Bring to a boil; reduce heat and simmer uncovered until vegetables are tender.

4. Add white beans, cabbage, zucchini and green beans; cook until heated through and cabbage is slightly softened. Add remaining chicken broth as needed, though minestrone should be fairly thick.
Taste and adjust seasonings (typically more salt and occasionally some hot sauce).
5. Add the wine and spinach; stir in until greens wilt. 

6. Spoon equal portions of cooked pasta, about 1/3 cup each, into individual soup bowls; ladle the soup over the the pasta. Top each with Parmesan and/or gremolata and serve.


Sunday, December 3, 2017

Brownie Crackle Cookies


What could possibly be better than an ooey, gooey, fudgey, still-warm, double chocolate brownie? Mmmmm, not much since this chocolate lover finds brownies nearly irresistible, BUT a whole brownie can be too much of a good thing. Finishing a brownie calls for commitment. Ta da! Brownie Crackle Cookies to the rescue, for those moments when just one bite will suffice. Not as densely chocolatey as a fudgey brownie, these cookies still scored a two-thumbs up rating from my chief taste tester.

The recipe comes from a box of Ghiradelli Double Chocolate Brownie mix, the blend with chocolate chips already in the package. My pantry always holds a box or two of brownie mix for emergencies (don't judge). I added a handful of chopped walnuts to this batch for a bit of crunch, an optional addition we enjoyed enough to repeat. 


Yesterday's not-so-much "emergency" was more a matter of timing, I needed a simple but delicious snack in a hurry. These cookies were just that - simple to mix and delicious to eat. A box mix designed for 16 brownies instead produced 3 dozen cookies, enough to serve afternoon guests and still have some left for the cookie jar. Win, win!

Brownie Crackle Cookies
yields approx 2-1/2 to 3 dozen cookies

1 box Ghiradelli Double Chocolate Brownie Mix
1 cup flour
3 eggs
1/3 cup canola oil
1/2 cup walnut pieces, chopped (optional)
3/4 cup powdered sugar

Preheat the oven to 350 degrees F. Line baking sheets with parchment paper or silpats.

Stir together the brownie mix and flour in a medium bowl. Add the eggs and oil; stir until blended. Add the nuts and stir to mix.

Measure the powdered sugar into a small bowl.
Use two tablespoons or a small cookie scoop to form tablespoon-sized balls of dough. Roll each ball gently in powdered sugar to coat completely. Place the sugar-coated balls about 2 inches apart on the prepared baking sheets.

Bake 11-13 minutes, rotating baking sheets halfway through.


Monday, November 27, 2017

Chipotle Cheddar Puffs


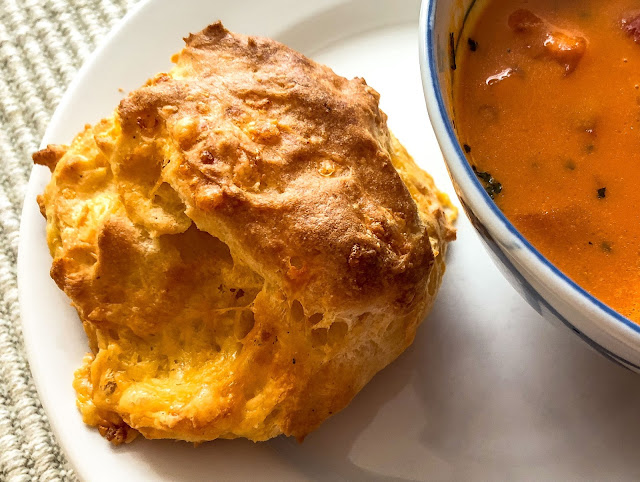
Is there any better comfort food combination than a cup of tomato soup plus a toasted cheese sandwich? Maybe yes, maybe no, but here's a variation that took top honors recently - Roasted Tomato/Red Pepper Soup with Chipotle Cheddar Puffs. Yes indeed, spicy gougeres win out over toasted cheese sammies any day.

While these little bites make amazing stand-alone treats, they outperform as sandwich "breads". Crisp, crunchy exteriors surround moist, soft and airy interiors. Chipotle and extra sharp cheddar cheese add an extra bite to the overall taste, but are not overly assertive. Add a thin slice or two of ham or turkey, a few green leafy things, perhaps a squirt of your favorite mustard or hot sauce and shazam! you have a delightful appetizer, tailgate or apres ski treat, and the perfect accompaniment to a warming bowl of soup. 


Savory puffs may look impressive, maybe even appear challenging to prepare, but really they are unbelievably easy to make. Only 9 ingredients and 5 short steps... 

  1. Boil milk, water, butter and seasonings.
  2. Stir in flour 
  3. Whisk in eggs
  4. Add grated cheddar 
  5. Bake ... enjoy


See, ridiculously easy, though you don't have to share that fact with non-cooks. 

Cheese Puffs rock, no matter what the season. After a long holiday weekend of overindulgence, this soup and sandwich combo would be a welcome change from yet another round of turkey sandwiches and turkey soup. Not that you need an excuse to bake and share these little bites of deliciousness at any time.  


Chipotle Cheddar Puffs
makes 8 - 9 puffs

1/4 cup milk
1/4 cup water
1/4 cup unsalted butter (1/2 stick)
1/4 teaspoon salt
1/8 teaspoon white pepper
1/4 teaspoon ground chipotle pepper (or cayenne or ancho)
1/2 cup all-purpose flour
2 large eggs
1 cup grated extra sharp Cheddar cheese

Before you begin: preheat the oven to 400 f. Grease a baking sheet or line with parchment or a silpat.

  1. Add the first 6 ingredients (milk to chipotle pepper) to a heavy small saucepan. Bring to a boil over high heat. 
  2. Reduce the heat to medium and add the flour all at once. Use a wooden spoon to beat the mixture until it comes together and leaves the side of the pan. Continue to beat for a full minute to incorporate all of the floury bits.
  3. Remove the mixture to a bowl before adding the eggs, 1 at a time. Whisk in each egg thoroughly after each addition. 
  4. Add the cheese and stir to incorporate.
  5. Drop the batter in 8 or 9 equal portions onto the prepared baking sheet. Bake in the upper third of a preheated 400 f oven until crisp and golden, about 20 to 23 minutes in my oven.
Serve immediately, or transfer each puff to a baking rack to cool (this avoids a soggy bottom). If made a day ahead, store overnight in an airtight container and reheat for 5 minutes at 400 f.


Friday, November 17, 2017

Beef Enchiladas Verde with Peppers, Corn & Beans


Powered devices rudely announced that our power went out at 4:41 a.m. After that annoying chorus of beeps, clicks, chirps and alarms woke us up, we wandered through the house to address their status with taps and resets. Then we tried to ignore the rattling screens and gusting winds and fall back asleep. Hah! good luck with that. Power was restored about four hours later, but the winds continued to howl mightily. The lights flickered intermittently all day; it was going to be one of those days. Hello, Fall.


I turned to enchiladas, a favorite Tex-Mex comfort food, to help improve my outlook and attitude later in the day. Enchiladas are always welcome lunch fare, so I rummaged through fridge and cabinets to concoct this version of rolled enchiladas. With beef, beans, corn, peppers, and a peppy melting cheese rolled inside a tortilla, what's not to love?! My beef enchiladas typically feature a homemade red sauce, but substituting an available can of green sauce proved to be a successful swap. 

A more traditional recipe would call for 1) dipping a fresh tortilla in sauce and frying it before filling, or 2) frying a fresh tortilla in hot oil for a few seconds to soften it, then dipping it in sauce before filling. This isn't that. My naked flour tortillas were rolled around a loose filling, placed atop a bed of sauce, and topped with more sauce. Covering the dish with foil kept the tortillas soft while they baked; then an uncovered finish crisped them up just enough. Less mess, slightly faster preparation, but still delicious. Win! 


Beef Enchiladas Verde with Peppers, Corn & Beans

yields 8 enchiladas.

Ingredients:
1 can (15+ oz) mild green enchilada sauce, divided (Hatch, Old El Paso, Las Palmas, etc.)
1 scant Tablespoon canola oil
1 pound lean ground beef
1 medium onion, diced
1 large poblano pepper, diced  (or 1 can diced Anaheim chiles)
1 Tablespoon chile powder (I used Penzey's Chili 3000)
1 teaspoon Mexican oregano
1 teaspoon cumin
1 teaspoon dried cilantro
1 teaspoon smoked paprika
2 cups mixed corn, red peppers, black beans & onions (I used 1/2  package of frozen SW mix)
2 cups shredded Pepper Jack Cheese
8 medium-size soft flour tortillas

Optional toppings:
additional shredded cheese, diced tomato, diced avocado,  fresh cilantro, sliced radish... and your favorite hot sauce (Green Tabasco here)

Directions:
  1. Spread a scant cup of enchilada sauce across the bottom of a 9x11 baking dish. Set aside. Preheat the oven to 350 f.
  2. Heat the oil over medium heat in a large skillet. Brown the beef, then remove with a slotted spoon and set aside, leaving the oil in the pan. Add onion and poblano to the heated oil and cook until softened. Spoon off the accumulated oils. 
  3. Add the seasonings, chile powder to paprika, and cook for a minute or two until fragrant; stirring occasionally. Remove the skillet from the heat and add the cooked beef and mixed SW vegetables to the pan; toss and stir to combine.
  4. Place a flour tortilla on a flat plate; spread a generous 1/4 cup of the filling and 1/4 cup of cheese in a line across the bottom third of the tortilla. Roll to enclose and place, seam side down, in the prepared baking dish. Repeat with remaining ingredients.
  5. Pour the remaining sauce over the top of the rolled enchiladas, scatter and extra filling and some cheese over everything. Cover with foil and bake for at least 30 minutes. Remove foil and bake uncovered for an additional 10 or 20 minutes until the cheese melts and the tortillas just begin to crisp and brown.
  6. Remove, top with desired items and serve, or plate individually and offer toppings separately.
Note: leftovers covered with plasticwrap and reheated the next day in the microwave were soft, moist, and still darned good!

Tuesday, November 14, 2017

Stovetop Apples with a Crunchy Topping


Too many apples? No way, that's not happening in this galley. I slice a lot apples for snacks, add them to salads, and bake scores of applicious breads and desserts. But... there hasn't been much baking happening this month since the galley oven died. While I'm searching for a suitable replacement this quick, skillet-on-the-stovetop version of apple crisp took care of recent dessert cravings. Good? oh yes, it even scored a two-thumbs-up rating from chief taster, Capt. Ron.


Read on for some rambling notes on apples, or skip to the end for the recipe that follows. I won't judge.

Ever since a chance tasting, a sample handed out by a vendor at Seattle’s Pike Place Market many years ago, Honeycrisp apples have been our favorite eating apple. Developed at the University of Minnesota in their search for new cold-hardy cultivars with high flavor, the Honeycrisp were first released in 1991. The sweet-tart balance and distinctive crunch brought early, widespread acceptance. Known for an “explosively crisp and juicy texture”, Honeycrisp quickly nudged aside the iconic Red Delicious, Washington State’s long-standing classic and traditional favorite. While we love Honeycrisps, they are typically the most expensive apples available, so I opt to use cheaper varieties for baking.


And then in October, while shopping at the marina's grocery, we happened upon a worthy Canadian competitor, the Ambrosia. Named after the “food of the gods” in mythology, this amazing apple delights multiple senses. It's unique appearance features a glossy, bi-coloured skin with a bright pink splash on a creamy-yellow background. Then there's its distinct perfumed aroma. Bite into an Ambrosia and revel its sweet, juicy and crisp-textured flesh. Mmmmm, no wonder this delicious, low-acid apple rates high in taste tests. Born from a chance seedling and finally registered in 1993, the Ambrosia has grown in popularity and is now available worldwide. Ambrosia is a low-acid apple making it easier to digest, is slow to brown and is great fresh or baked. 


Stovetop Apples with a Crunchy Topping

Streusel Topping:
1 stick (8 TBS or 4 oz) butter
1 cup AP flour
1/2 cup chopped nuts (pecans or walnuts are favorites)
1/2 cup light brown sugar
1/2 teaspoon apple pie spice* (or ground cinnamon)

Fruit Filling:

2 Tablespoons butter
1/4 cup sugar (more if using tart apples)
2 Tablespoons cornstarch
1/2 teaspoon apple pie spice
3 to 4 large apples; peeled, seeded & sliced

For the topping:
  1. Melt the butter in a 10-inch skillet (cast iron or nonstick) over medium heat. Remove from the heat and add the remaining ingredients. Stir to combine until the mixture is moist and "clumps".
  2. Place the skillet back on the burner and cook over low heat until the mixture is golden brown and fragrant, about 8 minutes. Stir frequently to avoid burning! 
  3. Remove the streusel to a large plate or cookie sheet to cool; it will crisp up as it cools. Set aside if using soon, or store in an airtight container at room temperature if making a day or two ahead.

For the fruit:
  1. Melt the butter in the same skillet over medium heat. Add the sugar, cornstarch and spice; heat and stir continuously until the sugar dissolves.
  2. Add the apples, tossing carefully to coat each slice.
  3. Cover the skillet and cook over medium to medium-low heat until apples soften, roughly 7 or 8 minutes depending on the thickness of your slices. Uncover and cook until the sauce thickens slightly, 3 to 5 minutes more. Don't overcook the apples into applesauce!

To serve:
Top with streusel and offer ice cream or softly whipped cream to accompany, OR dish up individual parfait-style servings, alternating fruit with toppings.
Delicious served warm, this is also quite tasty at room temperature.

 *Penzey's Apple Pie Spice contains a mix of cinnamon, nutmeg, mace and cloves (link)


Friday, November 10, 2017

October/November In My Kitchen and Galley


...plus a few lunches out and about.


 Yes, it's Hatch Chile Time once again. This 5-pound box arrived long after we finished the previous shipment. The heavenly aroma of roasting chiles briefly perfumed the entire house, and that's almost reason enough to roast them. A handful of fresh chiles went into the fridge for immediate use, but the bulk of this batch went into the freezer after roasting, ready for enchiladas, dips, omelets, and more in the weeks ahead. Mmmmm, we do love New Mexican chiles! 


Warm Autumn days and settled weather drew us north to the boat, as though we needed an excuse. 


This 180-degree panorama is a tidier-than-usual peek inside Rhapsody; salon at the left, galley in the middle, and the stairways to the right lead down to the staterooms and up to the pilothouse. Full disclosure: Life afloat usually involves more stuff filling the counters, things like in-progress project debris and cooking equipment. While we enjoyed several weeks of Fall sunshine, early morning fog in Discovery Channel and condensation on cold galley windows reminded us that the weather was changing.   


Dock neighbor Ember surprised us with a large bag of chanterelle mushrooms she had picked over the weekend at one of her secret island spots. What a delicious, thoughtful treasure to share. Mushrooms sauteed in garlic butter were ahhhhmazing as a steak topper that night - thanks Ember! The bulk of the 'shrooms were cleaned, sliced, sauteed and frozen for later use. 'Shrooms and pasta, mushroom soup, 'shroom-filled crepes, mushrooms in SO many other preparations... oh, yes!


For the past decade or more apple season has meant searching for Honeycrisp apples at an affordable price. Costing more than double or triple the price of other varieties, Honeycrisps are relatively expensive. I love to eat Honeycrisps but am usually too cheap frugal to cook with them. The harborside grocery recently featured a new-to-me Canadian variety, the Ambrosia apple, which immediately became our new favorite.


First registered in 1993 the Ambrosia offers a perfumed aroma, crisp texture, low-acid sweetness (which makes it easier to digest) and is slow to brown. What's not to like? We ate them for snacks, chopped them in salads, and enjoyed a few in stovetop desserts. Stovetop? Yes, the oven still awaits replacment. Skillet apples with a crunchy streusel topping were a welcome treat.


Snow flurries accompanied us on the trip back to the mainland, and we've seen the flip side of Fall weather ever since. Now it's time for bulky sweaters, comfort food and socializing over meals with friends and family. Lunches out lately have included:

Yellow Curry with Crab and Red Curry with Shrimp at Kirkland's Thai Soul Kitchen


Two Tamales with Mole Sauce and a Brisket Burrito at Cactus in Seattle's Madison Park neighborhood,


and the indescribably delicious Moroccan Fried Trout Tacos at nearby Meet the Moon Cafe.


Procrastination struck and it's down to the final few hours open to join other bloggers for this month's In My Kitchen posts. Hmmmm, that could make for a missed edit or two. This post is linked to Sherry's Pickings, the mothership for the monthly IMK roundup. You'll enjoy clicking over for a don't-miss-it opportunity to explore other kitchens around the world. 


Thursday, October 19, 2017

Speedy Sausage, Kale & Potato Soup


Brrrrrr, early this morning the view through the window was wet, gray and totally uninspiring so I made the obvious decision to stay snugly tucked under the covers and read. Hours rolled by as The Goldfinch by Donna Tartt transported me into other lives, other worlds. No book review here; I'm still processing my many mixed responses to this lengthy Pulitzer Prize winning novel. But shortly after noon a series of annoying stomach rumbles reminded me that breakfast was a lost hope and I'd better get up and start moving on lunch prep. 

Soup fit my mood and the weather; quick comfort food is always a good thing on a cool, dreary day. The open bag of Halloween candy, my favorite Snickers bars conveniently stored on an adjacent kitchen counter, didn't even tempt as an emergency snack. Nope, instead some spicy chicken Andouille sausage, Yukon gold potatoes and curly kale prompted a flurry of chopping and cooking, tasting and seasoning without benefit of a recipe. The result? A warming bowl of soup that pleased us both. How do I know? RL ate two full servings and didn't even reach for the hot sauce. 

Lemon zest and juice added an extra pop to each bowl, brightening the flavor while avoiding a too-sour bite. Soups and stews typically improve with an overnight rest, so I am eagerly anticipating another bowlful at lunch tomorrow. 

 Speedy Sausage, Kale and Potato Soup
serves 3-4

1 Tablespoon olive oil
1 large onion, medium dice
1 Tablespoon minced garlic
2 links cooked sausage, sliced (precooked chicken Andouille today)
2 large Yukon Gold potatoes, cut in 1" dice
1 teaspoon dried oregano
1 teaspoon dried rosemary
1 teaspoon dried basil
4 cups low sodium chicken broth
2 cups kale, destemmed & roughly chopped
zest of 1 large lemon
salt and pepper, to taste
1 cup instant potato flakes (optional)
lemon wedges to serve alongside
shredded Parmesan cheese, optional

Heat the olive oil in a medium kettle over medium-high heat. Add the onion and cook for several minutes to soften. Add the garlic and cook for an additional minute or so until fragrant. 

Add the coins of sausage, diced potatoes and herbs; toss to coat. Add the chicken broth and cook until the potatoes are just tender. 

Add the kale and cook a few minutes longer until softened. Stir in the lemon zest. Taste and adjust seasonings.

For a thicker broth, stir in instant potato flakes, 1/4 cup at a time. (You could mash the cooked potatoes to thicken the soup, but I like a thicker broth and potato chunks.)

Ladle into bowls, sprinkle with shredded Parmesan and serve with lemon wedges.


Thursday, October 5, 2017

Summer 2017 IMK Notes


In and Out of My Kitchen...

Summer 2017 has been memorable for Seattle's record-breaking stretch of hot, dry weather; an incredible number of horrific wildfires that torched forest lands in western US and Canada; throat-irritating smoke and ash from those same fires that filled the air for weeks, transforming both sun and moon into brilliant red/orange orbs; and the fleeting thrill of a rare total solar eclipse. Life in my kitchen tended toward the unpredictable as well, but we're back on track for a calmer Autumn. 


Foodwise, we reveled in the abundance of produce. Our three sunloving Asian pear trees produced a record crop, a challenging mixed blessing since so many ripen at once. I've tried to be magnanimous and forgive the marauding raccoons and squirrels who take one big bite, just one! out of dozens of pears. This year there was more than enough fruit to share.


Summer stone fruits, melons, blueberries, and mint make my tastebuds sing. Mint is a total pest, growing like a weed in a sideyard bed, but it's so aromatic that it is worth the effort to keep it in check. Think more fruit salads, more mojitos...


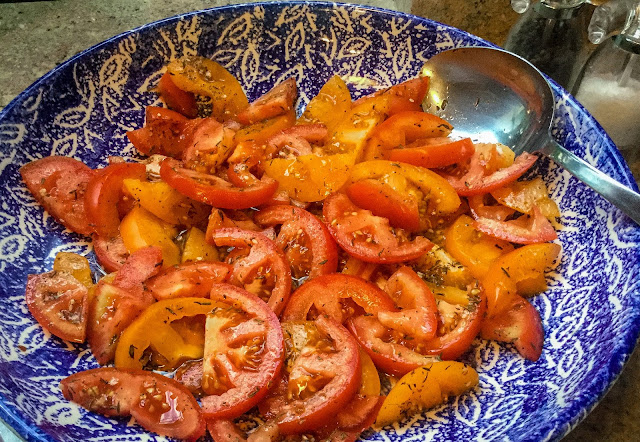
 Vine-ripened tomatoes are the gold standard flavorwise, and 2017 produced a bumper crop locally. Now I wish I had put in a few plants, but the neighborhood markets kept us well supplied. Tomatoes plain, tomatoes sauced, tomatoes in soup, tomatoes in salads... yes!


Pastry hand pies were not my thing, no matter how I tried, so I moved on and worked instead with pizza dough to bake calzone and stromboli. Mushrooms, kale, mozzarella, basil, garlic and walnuts combined for the latest filling. I ate mine plain, but RL preferred his share dunked in spicy red sauce.   


After sorting through my kitchen towel drawer, reluctantly tossing some threadbare favorites, I treated myself to some replacements. The first two were plain and serviceable, my favorite color but nothing special. More remarkable is the lack of any new kitchen gadgets. Such restraint!


In and Out of My Galley...

Tea towels plus matching pot holders caught my eye at Wei Wai Kum House of Treasures, a First Nation store in Campbell River, BC. I carried these treasures south after the trip, thinking they might make attractive gifts for friends. They would, but I decided to keep them for myself and will transport them back to the boat for galley use.


During her week aboard niece Slone helped me organize galley cabinets and pantry, discarding items past their pull date or otherwise questionable. No effort required to deal with the fridge - it had stopped chilling and was empty. We went old school during the trip and used two styrofoam coolers instead. Two freezer drawers and a separate icemaker still functioned so we froze ice blocks to rotate in and out of the coolers on the back deck. It worked, though Slone made countless trips daily in and out to the coolers. Our preplanned menu shifted a bit as we focused first on fresh greens etc., using them while they were stilll crisp. 


Photo: Slone's Loaded Chicken Taco Salad
Our several restaurant outings were all about seafood. The Bouillabaise at the Pt. Roberts, WA Compass Rose Bar & Grill was bowl-licking good... so good I forgot to take photos. I wish they sold cartons of the base sauce, it was that good. Trollers Fish & Chips on the dock in Nanaimo, B.C.'s busy harbor failed to live up to its advertised "Best in town" claim. Overbreaded and overcooked fish proved disappointing. Again, no photos. Ah, but the totally terrific dinner at Campbell River, B.C.'s Riptide Marine Pub was everything we could hope for; very fresh seafood that was well-prepared, a knowledgeable and efficient waitstaff, plus an upbeat vibe. This time I remembered photos.      

Photo: My Togarashi Tuna Plate at the Riptide Marine Pub
Photo: RL's Seafood Linguini at the Riptide Marine Pub
Photo: Slone's Seafood Puttanesca Fettuccini at the Riptide Marine Pub
And then the weather changed; Fall was suddenly in the air if barely on the calendar. The rainbow below hints at good things to come. I'm ready.


Linked to a post at Sherry's Pickings highlighting the happenings in other kitchens around the world. Pop over to meet some interesting cooks, find tempting new recipes and enjoy tales of life, travel and so much more.

Related Posts Plugin for WordPress, Blogger...