Showing posts with label biscuits. Show all posts

Monday, November 27, 2017

Chipotle Cheddar Puffs


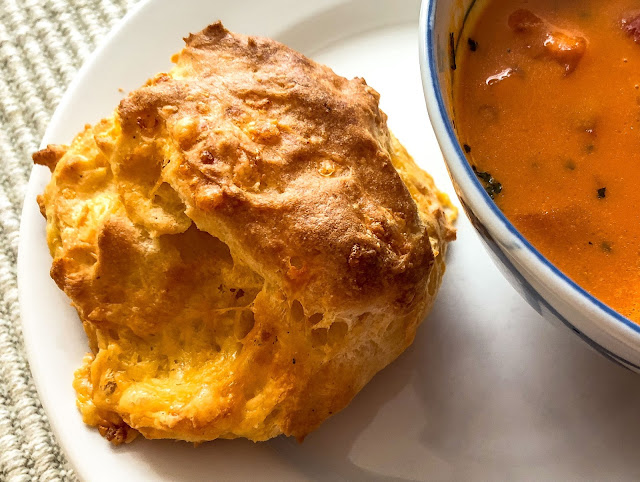
Is there any better comfort food combination than a cup of tomato soup plus a toasted cheese sandwich? Maybe yes, maybe no, but here's a variation that took top honors recently - Roasted Tomato/Red Pepper Soup with Chipotle Cheddar Puffs. Yes indeed, spicy gougeres win out over toasted cheese sammies any day.

While these little bites make amazing stand-alone treats, they outperform as sandwich "breads". Crisp, crunchy exteriors surround moist, soft and airy interiors. Chipotle and extra sharp cheddar cheese add an extra bite to the overall taste, but are not overly assertive. Add a thin slice or two of ham or turkey, a few green leafy things, perhaps a squirt of your favorite mustard or hot sauce and shazam! you have a delightful appetizer, tailgate or apres ski treat, and the perfect accompaniment to a warming bowl of soup. 


Savory puffs may look impressive, maybe even appear challenging to prepare, but really they are unbelievably easy to make. Only 9 ingredients and 5 short steps... 

  1. Boil milk, water, butter and seasonings.
  2. Stir in flour 
  3. Whisk in eggs
  4. Add grated cheddar 
  5. Bake ... enjoy


See, ridiculously easy, though you don't have to share that fact with non-cooks. 

Cheese Puffs rock, no matter what the season. After a long holiday weekend of overindulgence, this soup and sandwich combo would be a welcome change from yet another round of turkey sandwiches and turkey soup. Not that you need an excuse to bake and share these little bites of deliciousness at any time.  


Chipotle Cheddar Puffs
makes 8 - 9 puffs

1/4 cup milk
1/4 cup water
1/4 cup unsalted butter (1/2 stick)
1/4 teaspoon salt
1/8 teaspoon white pepper
1/4 teaspoon ground chipotle pepper (or cayenne or ancho)
1/2 cup all-purpose flour
2 large eggs
1 cup grated extra sharp Cheddar cheese

Before you begin: preheat the oven to 400 f. Grease a baking sheet or line with parchment or a silpat.

  1. Add the first 6 ingredients (milk to chipotle pepper) to a heavy small saucepan. Bring to a boil over high heat. 
  2. Reduce the heat to medium and add the flour all at once. Use a wooden spoon to beat the mixture until it comes together and leaves the side of the pan. Continue to beat for a full minute to incorporate all of the floury bits.
  3. Remove the mixture to a bowl before adding the eggs, 1 at a time. Whisk in each egg thoroughly after each addition. 
  4. Add the cheese and stir to incorporate.
  5. Drop the batter in 8 or 9 equal portions onto the prepared baking sheet. Bake in the upper third of a preheated 400 f oven until crisp and golden, about 20 to 23 minutes in my oven.
Serve immediately, or transfer each puff to a baking rack to cool (this avoids a soggy bottom). If made a day ahead, store overnight in an airtight container and reheat for 5 minutes at 400 f.


Tuesday, March 15, 2016

Bacon Cheese Puffs: Gougeres+

...recommended for breakfast, as appetizers, or as anytime treats!


Pastry puffs and I have a long and complicated history. Here's the short version of our troubled relationship:
    1) Sweet cream puffs (choux) are sometimes unreliable, often failing to puff, instead producing flat wafers. 
    2) Savory cheese puffs (gougeres) perform more consistently, but an occasional batch will still go rogue.
    3) Sweet and savory puffs only fail when success is really, really important, like a company event. Always have a biscuit backup plan, just in case


That said, this week's gougeres, a potential disaster-in-the-making, ultimately rose to the challenge and saved the day and my reputation as a cook. A guest texted a message announcing major traffic problems and her late arrival for lunch. No problem, I delayed mixing a small batch of cheese puffs until the last minute. Fiddling around in the kitchen, I created a new salad dressing, set the table, eventually grew totally distracted and it all went downhill from there. In a rush to get the puffs mixed as she arrived, I somehow doubled the liquids but didn't notice the mistake until after adding the butter and flour. No matter how much I beat in the flour, the dough refused to come together into a ball. Oops! Reread the recipe, check out the measuring cup, roll eyes and smack self on the head. 

Instead of starting over I pressed on and hoped for the best. At worst there would be one more interesting kitchen story. Sigh! 

  • Melt more butter and beat in over low heat.
  • Beat in 4 eggs, one at a time, and don't complain when arm grows tired because the dough is heavy. 
  • Beat in more flour and keep beating until the dough forms a ball. (Remember to smile.) Sing Hallelujah! when it finally comes together. 
  • Add the cheese, bacon bits and pepper; scoop 16 balls onto two silpat-lined baking sheets and send a prayer skyward to the kitchen gods while the puffs bake.

Whew! luck prevailed. The texture was spot on; a crunchy exterior covered light, tender insides and most puffs displayed hollow centers. These were the best gougeres ever. Go figure! Doubling the recipe worked, even with such an unorthodox method. Slone left with a package of puffs for her drive south and we enjoyed the remaining treats as breakfast sandwiches over the next several days. 


Bacon Cheese Puffs (Gougeres+)
 adapted from Gourmet’s In Short Order, 1993

Makes 8 puffs

1/4-cup milk
1/4-cup water
1/4 cup (1/2 stick) unsalted butter
1/4-teaspoon salt
1/2-cup all-purpose flour
2 large eggs
1 cup freshly grated Parmesan cheese
1/4-cup crumbled cooked bacon
Freshly coarse-ground black pepper to taste (or substitute white pepper)

Directions:
Preheat the oven to 400 F.

Use a small, heavy saucepan and combine milk, water, butter and salt. Bring the mix to a boil over high heat. Reduce the heat to moderate; add the flour all at once and beat the mixture with a sturdy wooden spoon until it leaves the side of the pan and forms a ball. Stir for 2-3 minutes longer to dry out the dough a bit. 

Remove the dough from the heat and transfer to a bowl; beat for another minute or two until the dough cools down a bit and stops steaming. Use a heavy spatula or whisk and beat in the eggs, 1 at a time, whisking well after each addition.  Stir in the cheese, bacon and pepper.

Drop or scoop the batter in 8 mounds on a prepared baking sheet or silpat. Bake puffs in upper third of a preheated 400 oven for 20-25 minutes, or until crisp and a rich golden brown. 

The puffs may be kept overnight in an airtight container. Reheat briefly in the oven, if desired, but note the puffs will lose crispness if reheated in a microwave. 

Tuesday, September 15, 2015

Tex-Mex Beer Biscuits


It's nearly Fall, with just one more week until the official autumnal equinox. Leaves are turning colors locally, brightening up our gray days with great sweeps of neon reds and oranges on nearby hillsides. NFL season is in finally in full swing with team rosters set. (Go Hawks!)

You know it must be time for chili and cornbread and red plastic cups at tailgate parties... But this week I'd rather indulge in beer biscuits and pass on the bottled brews. Yes, I'm back on crutches this month and mindful of careful footwork and balance. So I will pass on the usual cornbread too, and reach for some more of these flavor-packed biscuits instead. They make tidier finger food with fewer crumbs but are still loaded with some of my favorite southwest flavors. Pepper jack cheese, bacon, green onions, chile powder...yum! Now I wonder how a waffled version would work???  


Tex-Mex Beer Biscuits
based on a recipe from the Beeroness

Ingredients:
3 1/2 cup all-purpose flour
2 tsp baking powder
1 1/2 tsp baking soda
1 tsp salt
1 tsp sugar
1 tsp chile powder (a blend or ancho or chipotle)
1 stick (that's 4 oz or 8 tbs) cold butter, cut into small cubes
1/2 cup lite sour cream
2/3 cup beer
½ cup shredded jalapeño jack cheese
3 Tbs finely chopped green onions
3 Tbs cooked bacon, crumbled
2 Tbs melted butter
¼ tsp coarse sea salt (smokey bacon salt preferred)
   
Directions:

  1. Preheat oven to 400.
  2. Oil a baking pan or spray with cooking spray.
  3. Place the flour, baking powder, baking soda, salt, and sugar in the bowl of a food processor; pulse to combine. 
  4. Add the cold butter; process until combined.
  5. Add the sour cream, cheese, green onions, bacon and beer; Pulse until just combined.
  6. Turn out onto a well-floured mat or board; knead lightly and pat into a rectangle, about 3/4 inch thick.
  7. Fold the dough into thirds; roll lightly, once in each direction to about 1 inch thick. 
  8. Fold in thirds again; roll lightly to about 1 1/2 inch thick.
  9. Scoop with a cookie scoop, cut with a knife or use a floured biscuit cutter to form 12 biscuits. Place in the prepared baking pan.
  10. Brush biscuits with melted butter and sprinkle the tops with salt.
  11. Bake at 400 for 12 to 15 minutes, or until the tops are a light golden brown.


Thursday, March 20, 2014

Sourdough Soda Bread Biscuits...

...with orange zest, currants and a slight Sourdough twist. 


Soda Bread was the March project for Sourdough Surprises, a fun monthly group of bakers who strive to use sourdough starters for things besides bread. Since soda bread typically relies on baking soda for its rise rather than yeast, the added sourdough comes along for the ride as a flavoring ingredient only. In decades past my early attempts to make soda bread yielded bland, dense, dry loaves suitable for doorstops or boat anchors. I moved on to other loaves and never looked back, until this month's challenge put soda bread back on the menu.

An online search provided a gazillion choices (okay, over a quarter million). I selected a basic, non-sourdough recipe with few ingredients, then changed it... adjusted the flour and buttermilk quantities to account for some added sourdough starter... omitted the recommended caraway seeds... added orange zest to pop the flavor... and carried on with high hopes but low expectations. Small biscuits or loaves sounded somehow less risky than a full-blown loaf, less likely to break a toe if dropped, etc. 


Well hot damn, those little biscuits were delicious! They were moist, loose crumbed but not crumbly, and the orange zest and sourdough took the flavor w-a-y beyond bland. Why did I give up on soda bread so easily those many years ago?! 


Our St. Patrick's Day celebration menu featured Corned Beef baked with a mustard/orange marmalade glaze, Colcannon with Kale, Orange-sauced Carrots, Shamrock Cookies delivered by a local leprechaun, and surprisingly good Sourdough Soda Bread Biscuits. We all agreed, we shouldn't wait for the next St. Patrick's day to roll around in order to enjoy these biscuits again. 


Soda Bread Biscuits
based on a recipe from Food Network Magazine
yield: eight 3-inch biscuits

Prep Time:  10 minutes
Cook Time: 20 minutes
Dry ingredients:
1 3/4 cups AP flour
2 teaspoons sugar
3/4 teaspoons baking soda
1/2 teaspoon salt

Wet ingredients:
2 tablespoons cold butter, diced
1/2 cup currants or raising
zest of 1 orange
1/2 cup buttermilk (or 1/2 cup milk + 1 Tablespoon white vinegar)
1/2 cup sourdough starter

  1. Preheat the oven to 375 degrees F.
  2. Add the dry ingredients to the bowl of a food processor. Pulse a time or two to mix.
  3. Add the diced bits of cold butter to the bowl and pulse several times to incorporate.
  4. Add the raisins, fresh orange zest, buttermilk and sourdough starter to the bowl; pulse off and on until the dough comes together and begins to form a ball. 
  5. Don't get carried away and over pulse on any of the above steps - the dough is meant to be a bit wet, shaggy and sticky.
  6. Put the dough onto a lightly floured surface and pat it out evenly until it's about 1-inch thick. Use a floured biscuit cutter or a knife to cut it into 2 1/2 to 3-inch rounds.
  7. Place on a (silpat-covered) cookie sheet and bake at 375 degrees F for 15 to 20 minutes or until lightly browned.
  8. Best eaten warm the same day baked, or reheated in a bun steamer. Soda bread is not noted for it's keeping quality.


Friday, December 13, 2013

Green Onion Biscuits


It's true, I have a weakness for boules… baguettes… breadsticks… biscuits… rolls... and most other savory breadlike things.  Who can resist any of these baked goods when they are homemade and fresh from the oven? As the tantalizing aroma fills the kitchen, its easy to anticipate the taste, the crunch, the soft, airy interior. I've been known to scorch my mouth sampling a biscuit as soon as it left the oven. No drama today, just a fine batch of Green Onion Drop Biscuits, a new-to-me recipe that is worth repeating.

For years Parmesan Puffs have been my "go to" favorite for savory, one-bite biscuits, all crunchy on the outside with soft and melty interiors. They are dangerously addictive and never last long enough to worry about leftovers. But, they weren't quite what I needed this week. Today's Green Onion Drop Biscuits came about from a need to pair with - well, I'll fill that in in my next post, an SRC Reveal on Monday next. Just know that this recipe produces a tasty savory biscuit with a firmer interior, a crumb that can stand up to dunking or hold a moist filling. Check back in a few days to see them put to good use… the ones we didn't devour today. 

Update: Curried Chicken Salad made a delicious filling for mini versions of these Green Onion Drop Biscuits. The biscuits will be just the thing to serve with a steaming bowl of borscht tomorrow; I'll add a scattering of dill weed and skip the hot sauce in the dough. 

Green Onion Drop Biscuits
approx 6 medium biscuits 

3/4 cup all-purpose flour
1 teaspoon baking powder
1/4 teaspoon baking soda
1/2 teaspoon salt
1/8 teaspoon white pepper
2 tablespoons cold unsalted butter, grated or cut into small pieces
1/4 cup minced green onion, green and white parts
1/3 cup plain yogurt
several dashes of your favorite hot sauce, optional (I used Cajun Sunshine)

Directions:
  1. Preheat the oven to 425 degrees F.
  2. Use a sieve and sift together into a bowl the first 5 ingredients, flour to white pepper. 
  3. Add the butter and incorporate until you have a mealy texture.
  4. Stir in the green onion, yogurt and hot sauce if you are using;  mix just enough to have the soft and sticky dough just comes together.
  5. Divide the dough into 6 portions and drop by heaping spoonfuls onto a silpat-covered baking sheet.
  6. Bake on the middle shelf of a preheated 425 F oven for 12 to 15 minutes, until lightly golden brown. (Note: If you choose to make 9-10 smaller biscuits, they will require much less oven time) Be careful not to over bake or the biscuits will be rock hard and dry after they cool. Eat while still warm to enjoy them at their best.


Thursday, May 2, 2013

Buttermilk Skillet Scones with Cheese & Peppers


Buttermilk Scones with Cheese & Peppers

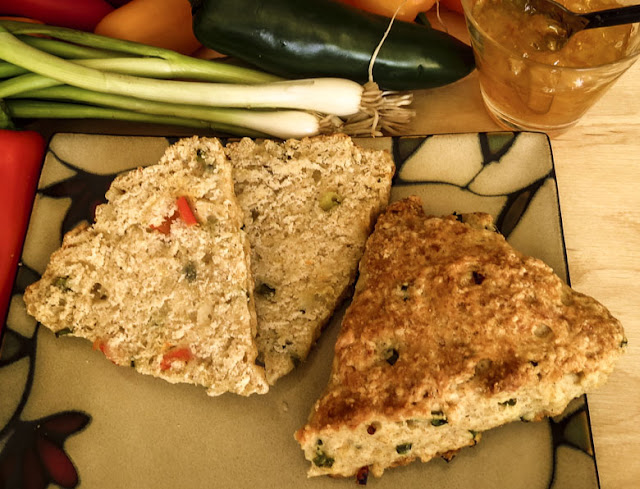
Savory scones are an occasional store-bought indulgence, a secret sneaked treat when I'm at the co-op, or the local bakery, or some Farmers' Markets. Somehow these flaky, veggie-filled triangles of delight have never come out of my oven, not until today. I woke up craving scones, jalapeno scones in particular, scones loaded with cheese and chunks of multicolored peppers. It's easy to find sweet scones, some okay and others meh!, but really good savory scones take a little searching. 
wanted them now, right now, without waiting to shower and get dressed to drive around town hunting for those savory treats.

No problemo. The Cast Iron Skillet Cookbook supplied a basic recipe that accommodated savory peppers and cheese as add-ins. Who knew? This book has traveled on the boat for years but was rarely used, so last Fall I moved it from the galley afloat to the kitchen ashore. Good move, since it thwarted any recipe panic this morning, 


The scones were wonderful served warm for breakfast, split in half and barely coated with a slick of butter. RL topped his halves with orange marmalade and ginger preserves, preferring to add a sweet note to the savory. Cooled and nibbled without butter or jam, a scone was the perfect lunch accompaniment to a bowl of chicken tortilla soup. Now I'm considering splitting one more scone, adding a slice of cheese and popping it into the microwave for a late-night snack. Sigh, my will power disappears when freshly baked scones are available, and that's the reason they should remain a store-bought indulgence. You I can't eat just one.


Buttermilk Cheese Scones with Peppers & Onions 
Recipe adapted from The Cast Iron Skillet by Kramis & Kramis-Hearne

Makes 12 scones

2 1/3 cups unbleached AP flour
2/3 cup whole wheat flour
1/8 cup sugar
2 1/2 teaspoons baking powder
1/2 teaspoon baking soda
1/2 teaspoon salt
3/4 cups chilled butter (1 ½ sticks), cut into 6 to 8 pieces
1/4 cup jalapeno, small dice
1/4 cup green onions, small dice
1/4 cup sweet red pepper, small dice
1/2 cup pepper jack cheese, shredded
1 cup buttermilk (or 1 cup milk + lemon juice to curdle)

  1. Preheat the oven to 400 F. 
  2. Add flour, sugar, baking powder, baking soda and salt to the mixing bowl of a stand mixer and stir briefly to mix. 
  3. Add the butter pieces and mix at low speed until just combined. (Low speed is recommended to avoid a cloud of flour billowing out of the bowl – ask me how I know this detail.) 
  4. Add the jalapeno, green onions, red peppers and cheese to the bowl. Run the mixer at low speed and pour in the buttermilk. Again, mix at low speed until just combined. 
  5. Divide the dough into two balls. On a lightly floured surface, pat or roll one dough ball into a circle, roughly ¾-inch thick. Cut the circle into 6 equal-sized wedges. Place the wedges in a buttered cast-iron skillet, spaced apart and forming a circle. 
  6. Repeat with the second ball of dough. 
  7. Place on a rack in the center of the oven and bake until golden on top, about 25 minutes in my oven. Remove from the oven and serve immediately, or cool on a baking rack and reheat later in the day. 

  8. Note: the use of a stand mixer is purely optional, you can mix the scones with a hand-held mixer (or by hand if you put a little muscle into incorporating the butter)


Monday, February 18, 2013

Drop Biscuits with Cheese & Chives


...a Pepper Jack and Yogurt Version.


Biscuits, mmmmmm, mmmmmm, who can resist a warm, fragrant, fresh-from-the-oven biscuit? Not me, especially if there's a spot of honey or pepper jelly to drizzle over each split half. 

Some biscuits are quite refined, rolled and folded flakey poufs, fancy ladies-lunch biscuits, proper little sweet cream numbers that are meant to be served in baskets lined with linen-napkins. I think generations of Southern cooks must have a special DNA strand that enables them to make perfect flakey biscuits effortlessly.

These are definitely not that type of biscuit. No, these craggy-topped drop biscuits are more rustic, savory and toothsome with a coarser, more open crumb. They seem designed to soak up honey butter or sausage gravy. They are often called to accompany chili or a hearty soup or stew. These biscuits are macho on the outside, and tender on the inside. Hey, that describes some people I know and love


Cheese and Chive Biscuits are delicious all by themselves, or plan to serve them split open and filled for sandwiches. Try one with your favorite chicken salad, or piled with thinly sliced ham, a slather of Dijon and a lettuce leaf. Pair one with scrambled eggs and bacon for breakfast, or add some crumbled bacon to the batter for Bacon, Cheese and Chive Biscuits. Oh my, I'm getting hungry just thinking about even more possibilities. 


Why use yogurt? The original Bon Appetit recipe called for 8 ounces of buttermilk, but I didn't have any on hand. The Greek yogurt and milk combination worked out so well as a substitute that I'll continue to use yogurt in future batches. I always have yogurt in the refrigerator, not so much any buttermilk. 


Cheese and Chive Drop Biscuits with Yogurt
adapted from Bon Appetit, February 2010

yield: Makes 8
active time: 25 minutes
total time: 55 minutes

       Scant 2 cups flour, AP or bread flour
       3/4 tablespoons baking powder
       3/4 teaspoons baking soda
       1/2 teaspoons salt
       1/4 cup (1/2 stick) chilled unsalted butter, cut into 1/2-inch cubes, plus extra melted butter for brushing
       1 cup (packed) coarsely grated pepper jack cheese (about 12 ounces)
       1/4 cup chopped fresh chives
       1 6-oz container plain Greek yogurt (I like Greek Gods brand)
       2 tablespoons milk
       Honey (optional)

  1. Position an oven rack just above center of oven and preheat to 425°F. Line heavy large baking sheet with parchment paper or a silpat. 
  2. Combine flour, baking powder, baking soda, and salt in food processor; blend 5 seconds. Add butter cubes and blend until coarse meal forms, about 30 seconds. 
  3. Transfer flour mixture to a large bowl. Add cheese and fresh chives; toss to blend. Gradually add yogurt and milk, stirring to moisten evenly (batter will feel quite sticky).
  4. Using lightly floured hands, pat dough into balls, OR use generous 1/3 cup batter for each biscuit, and drop onto prepared baking sheet, spacing about 2 inches apart.
  5. Bake biscuits until golden and tester inserted into center comes out clean, about 20 minutes. Brush the biscuit crusts all over lightly with melted butter. Let cool 10 minutes. (If you want crusty biscuits, cool them uncovered. If a softer crust is desired, then wrap the hot biscuits in a clean dish towel.) 
  6. Serve biscuits warm or at room temperature with honey, if desired.
Cook's Note: Today's batch used Greek God's honey yogurt and added 1/4 cup of mint to the dough. These biscuits were super delicious split and drizzled with honey! No, I don't think I'll pair them with sausage gravy or chili. 

Related Posts Plugin for WordPress, Blogger...