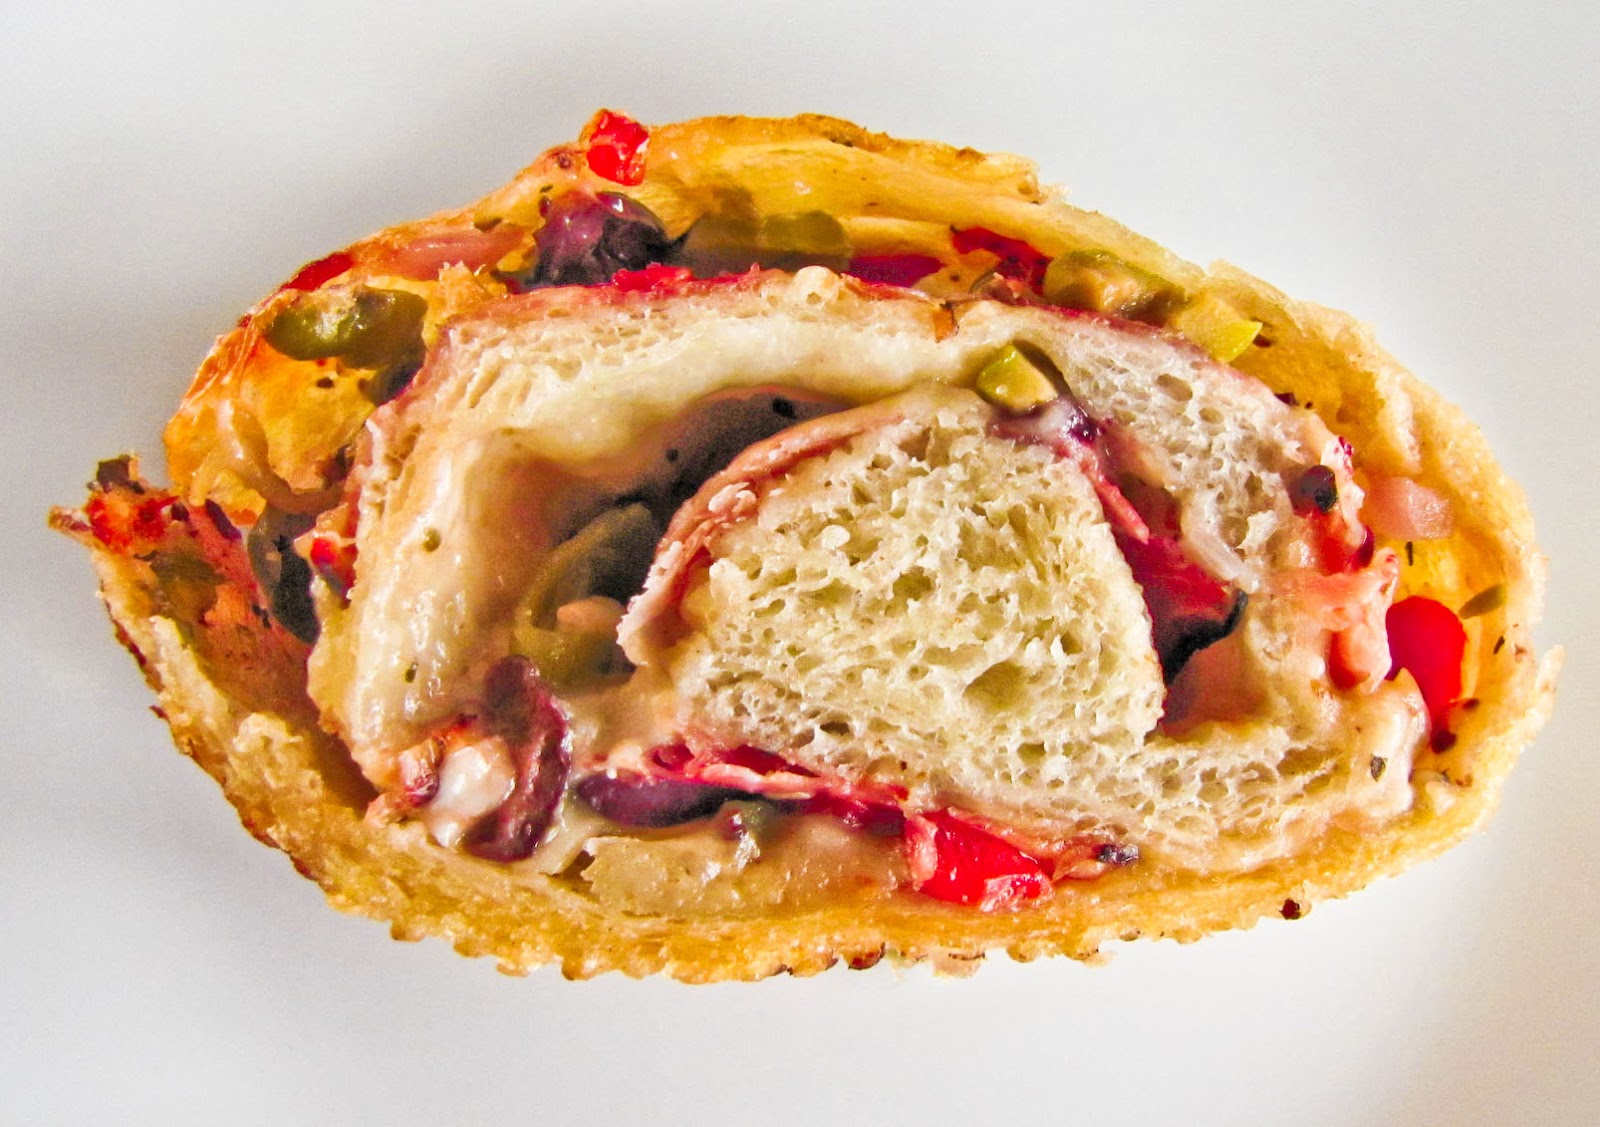
Was it Cajun-Italian fusion confusion? No, more like an off the wall notion that worked, utilizing bread dough and a variety of savory items already in the fridge. Our muffuletta-filled stromboli offered a delicious combination of flavors that played off the contrast between a tangy, salty olive salad and the mellow richness of cheese; all that layered with a smokey, cured meat and snuggled in a roll of fresh bread.
Earlier this week I made a full recipe of French bread instead of the usual half-batch. What was I thinking? all that bread for two people! After the dough’s first rise I formed two baguettes for immediate use and put the rest of the dough, almost half a batch, into a covered plastic tub. I popped that container into the refrigerator … and promptly forgot about it.

Three days later I pulled the dough out and wondered,” now what?”. We didn’t need any more bread in the galley, but it seemed a shame to waste it. While the dough came to room temperature, I scanned the contents of the refrigerator. How did so many partially filled jars and bottles accumulate in just five months? And how many could I use up this week, before clearing the fridge for winter?
I grabbed that tub of bubbly bread dough, jars of black olives, green olives, capers, garlic, pepperocini, and roasted red peppers, plus some red onions, sliced meat, assorted cheeses - hmmmmmm. Muffuletta sandwiches came to mind, and so did Italian Stromboli. All right! a combination of chopped savory filling rolled up inside a bread wrapping might work. It would be a muffuletta sandwich baked Stromboli style. Fast forward to the taste test - it was a hugely popular success, with us and our neighbor Trish who was a willing volunteer.
How did it all come together?
How did it all come together?

1. The first step was to mix up an olive salad using only the ingredients on hand. I didn’t need any more half-full jars to add to the existing collection, and anyway it was too stormy outside to walk to the store. It would have been nice to have some fresh Italian parsley, carrots and celery to add to the mix, but it tasted just fine without them.
2. Next I patted and rolled out the dough into a rectangle, it’s long side a few inches shorter than my baguette pan.
3. Using a slotted spoon and about half of the olive salad, I spread a thin layer over most of the dough leaving an empty one-inch border all around.
3. Using a slotted spoon and about half of the olive salad, I spread a thin layer over most of the dough leaving an empty one-inch border all around.
4. Then paper-thin slices of Bauernschinken, a German prosciutto-like cured meat with smokey edges, topped the olive salad. Two rows of cheese, thin slices of mozzarella and provolone, reached across from side to side, looking like pair of fat, yellow suspenders.
5. I had stretched the dough a little too thin, so rolling was a challenge. It took two hands and some coaching from the Capt. to form a firm cylinder, rolled from long side to long side. (Next time I’ll make several smaller rolls) The naked borders were pinched together to seal the roll at each end and along the long seam; my attempt to minimize the leakage of filling and oils.
6. The filled dough rested, covered, in an oiled baguette pan for about an hour, plumping up nicely. Sliced on top like any other baguette and brushed with beaten egg white, it was ready to bake in a preheated 400 F oven for 35-40 minutes.

Notes to self:
1. Roll the dough out a bit thicker and create a vent or two to avoid blowouts.
2. Make the rolling process easier by creating several individual-sized sandwiches.
3. Don't ignore the dough for three days.

Olive Salad Recipe
1 cup pimento stuffed green olives, roughly chopped
1 cup black olives, kalamata or Nicoise or a mix, pitted and roughly chopped
2 Tbs capers, chunked
1/2 cup roasted red peppers, roughly chopped
1/2 cup red onion, scallions or a mix, roughly chopped
6 pepperocini, stemmed, seeded, drained and roughly chopped
1 Tbs garlic, minced
1/2 Tbs dried oregano or basil or a blend of both
a sprinkle of celery seed
a pinch of red pepper flakes
a handful of fresh Italian parsley, chopped, if you have some (I didn’t)
1/4 cup olive oil
1/4 cup canola oil
freshly ground black pepper, to taste
Add all ingredients to a large bowl and mix well. Refrigerate for several hours to blend the flavors. Resist the temptation to nibble, if you can.
What did I do with the rest of the olive salad?
What did I do with the rest of the olive salad?

It could have been a terrific addition to pasta or even topped a pizza, but instead we made mufuletta sandwiches.
 |
| Photo: Guess who ate the open-faced appetizer sandwich... |
 |
| Photo: ... and guess who went for the fully-loaded, heated muffuletta. |
Last minute thoughts:
1. Slices are best eaten warm, but they were still tasty when covered and heated briefly in the microwave.
2. This was easy using my bread dough, but it would work using a tube of packaged dough - in case of an appetite emergency, you understand.


