Thursday, April 30, 2015

Cheese, Chorizo and Onion Frittata with Za'atar


Yes, it's one more frittata recipe, I'm averaging about one per year recently:
2011 Pasta Frittata
2012 Vegetable Frittata, and mini Frittata Muffins
2013 Tex-Mex Pasta Frittata, and now today's concoction.

 I can't help myself, I love these easy-to-prepare, make-them-with-my-eyes-closed, tasty breakfast dishes. Frittatas are so versatile, adapting to whatever is in the fridge for a casual family meal or starring as the favorite item in a company brunch buffet. 

Easy to cook? Yes, super easy because I use the cooktop-plus-oven method. You could get fancy and flip the entire thing over to cook the second side; it's not a big deal and I've done that before. Flipping means turning the partially set frittata upside down on another plate and sliding it back into the skillet to finish cooking. It does require some careful attention and a steady hand... or a bit of luck. Pick your favorite method, the frittata will be delicious either way.


An Everything Frittata

Serves 2-4, depending on appetites

Fillings: 

1 small onion, diced
1 small potato, cooked and diced (or rice or pasta)
1 link Chorizo sausage, diced (or bacon or other meat)
1 Roma tomato, diced
And/or any other tasty vegetables or other items you find in the fridge
Seasonings:
1 heaping teaspoon seasoning; think assertive herbs and spices like za'atar, oregano, basil, smoked paprika, cumin, ground chili, etc.
salt and pepper, to taste
Basic Frittata Mixture:
1/2 - 1 cup shredded cheese (mix of hard cheese & melting cheese)
4 large eggs (or 3 eggs plus some liquid egg white mix)

Directions:

1. Sauté & season the filling: Use a nonsitck skillet and cook the chorizo (or other meat) first. Discard most of the chorizo oil. Add the onion and potatoes and cook until the onion bits are softened and the potato has begun to brown. Stir in the tomato and seasonings and heat until warm. Taste and adjust seasonings; remember that this flavoring will stretch to include the egg/cheese mixture as well.


2. Add the Cheese: Spread the vegetables into an even layer; scatter 2/3 of the cheese on top and let it just start to melt.


3. Add the Eggs: Whisk the eggs and pour them over the filling and cheese; stir to incorporate. Cook until the eggs begin to set at the bottom and along the edges of the pan, pushing in the edges and tilting the pan to flow the liquid egg from the center onto the outer edges around the pan. When the liquid no longer runs move the pan into the oven.
4. Bake the Frittata: Put the entire pan into the oven and cook  until the eggs are nearly set. (Check by slicing into the center of the frittata.) Scatter the remaining cheese on top and return to the oven to finish cooking, but don't overcook. To crisp the top, broil for a minute or two until the cheese melts and begins to brown. Cool for several minutes before slicing into wedges. 


Serve with salsa, kimchi, sour cream or your favorite other accompaniments. Leftovers, if any, will keep for up to a week in the refrigerator. Enjoy them at room temperature or chilled.

Monday, April 27, 2015

Sweet & Spicy Baked Bacon


Just one whiff of cooking bacon is enough to make my tummy rumble, stir up the appetite, change any eat-healthy resolutions... you get the idea. I love bacon. The aroma is irresistible, but the sound of thick slices sizzling in a pan on the cooktop is a thing of the past. I'm a long-time convert to baking bacon in the oven. While I might occasionally miss the sizzle symphony, I certainly don't miss the mess, or the perfume of cooked bacon that used to cling to clothes and person after cooking a pan on the stove.

Bacon? a recipe post about cooking bacon? Of course. I just couldn't resist after reading this morning's post at Food52 on "The Best Way to Cook Bacon". They almost got it right; baking strips in the oven is the best approach but they blew it on flavor. Gourmet published their ultimate version of Sweet-and-Spicy Bacon ages ago (November 2001) and that has been the real deal, the only way to cook bacon ever since. 

Years ago one of the contestants on Top Chef used this method during a cooking ahallenge and received rave reviews and a lot of positive press over his "original" preparation. Original? not so much. But definitely tasty!

I have adapted Gourmet's method only slightly, laying the bacon strips on a baking rack set over a foil-lined baking sheet. This drains away the excess fat and makes for easier clean up after baking. Bacon cooks almost-unattended in the oven for roughly 35 minutes while I prepare the rest of the meal. Forget the mess and try this easy peasy method. Just heat the oven, arrange the bacon on the rack, turn the strips once during baking and sprinkle with the spicy sugary mix, and let the magic happen.


Sweet and Spicy Baked Bacon

1 1/2 tablespoons packed brown sugar
Generous 1/4 teaspoon cayenne
Generous 1/4 teaspoon black pepper

1 lb thick-cut bacon (typically 12 slices)

Directions:

  1. Preheat oven to 350°F. Cover a large baking sheet with foil or parchment. Place a metal baking rack on top of the lined pan. Or use an unlined broiler pan.
  2. Stir together the brown sugar, cayenne, and black pepper in a small bowl.
  3. Arrange the bacon slices in l layer on the baking rack and bake in the middle of the preheated oven for 20 minutes. 
  4. Turn the slices over, sprinkle evenly with the spiced sugar. and continue baking until each strip is crisp and brown, about 15 to 20 minutes more. Enjoy!


Sunday, April 19, 2015

Buttermilk Toasting Bread


It was our first week back on board and I had provisioning issues. The larder was nearly empty; no eggs, milk, fruit, yogurt, bread...  not anything even remotely tempting for breakfast before I headed ashore for groceries. Luckily a tin of powdered buttermilk could substitute for the liquid milk called for in my favorite English Muffin Toasting Bread recipe. Success! This adaptation worked so well that it might become the new standard for this loaf.

True to its name, the bread does invite toasting for best effect. Untoasted it is a bit dense with a tight crumb, more like a poundcake loaf rather than sandwich bread. That texture works beautifully to toast a thick slice and slather it with butter or jam, or even broil some as a base for sliced berries and yogurt. This week I welcomed it as a quick solution to an early-morning breakfast long before the stores opened. Early morning? Oh yes, it's the helicopter overhead story. (link)


Buttermilk (English Muffin) Toasting Bread
makes 1 loaf

3 cups AP flour
1 Tablespoon sugar
1 1/2 teaspoons salt
1/4 teaspoon baking soda
4 Tablespoons instant buttermilk powder
1 Tablespoon instant yeast
1 1/4 cups water
2 tablespoons vegetable oil or olive oil
cornmeal, to sprinkle in pan

Whisk together the flour, sugar, salt, baking soda, buttermilk powder and instant yeast in a large mixing bowl.

Combine the milk and oil in a separate, microwaveable bowl, and heat to between 120°F and 130°F

Pour the hot liquid over the dry ingredients in the mixing bowl and mix to combine. Then knead with a dough scraper and one hand for 5 minutes or more. The dough will be very soft, but resist the temptation to add more flour.

Lightly grease an 8 1/2" x 4 1/2" loaf pan, and sprinkle the bottom and sides with cornmeal. Scoop the soft dough into the prepared pan, and leveling it as much as possible.

Cover the pan loosely with plastic wrap sprayed lightly with cooking spray (or use a tea towel) and let the dough rise till it's just barely crowned over the rim of the pan. This will take about 45 minutes to 1 hour, if your kitchen isn't very cold. While the dough is rising, preheat the oven to 400°F.

Uncover and bake the bread for 22 to 30 minutes, until golden brown with an interior temperature of 190°F.

Remove the bread from the oven, let rest for 5 minutes then turn it out of the pan onto a baking rack to cool. Let the bread cool completely before slicing. It is best used for toast, or toasted for sandwiches. 

Wednesday, April 15, 2015

Brazilian Marinated Seaks with Chile Lime Sauce


Brazilian... really? while I can't vouch for the recipe's authenticity, I can imagine gauchos and vaqueros (link) knowing how to prepare a tasty steak. The idea and title come from Two Hot Tamales, and I'm not going to argue with that spicy duo. 

A 1 1/2-pound beef chuck roast sat on my counter, daring me challenging me to get creative, to move beyond the typical cold-weather pot roast, stew or chili. The calendar said it was officially Spring, the day was sunny and verging on warm; this was not a time for more wintery comfort food. I grabbed a knife and began the attack, moving forward without much of a plan. That small roast sliced neatly into four steaks, but then I had some concerns about the tenderness challenge.

Beef chuck comes from the shoulder of the cow, an area that is well muscled, heavily exercised, and has quite a bit of fat and connective tissue. It is known to be flavorful but tough chewy. One solution was to utilize a marinade. An acidic marinade can help tenderize a tough steak by permeating the meat and breaking down the connective tissues. I turned to this cookbook, an old favorite, for inspiration.


Red wine, lime, garlic and herbs - now that had potential. Flavorful? oh, yes! Chefs Milliken & Feniger recommend their marinade for rib-eye steaks, but a good rib-eye is already tender and I would hate to turn an expensive cut into mush. Chuck, however, seemed a good candidate for marination; chewy yet flavorful, affordable, and it was what I had on hand at the time. Done deal.

Lime juice and red wine are readily available acidic liquids and they did a fine job of tenderizing the chuck roast steaks in three and a half hours. Gauchos may not have time to marinate their meat for hours, but it was worth the wait for this city cook. The herbs and garlic added additional flavor and the resulting cooktop-grilled steaks were a major 4-star mealtime hit. The Chile Lime Sauce? Oh. My. Yes! don't skip the sauce, its bright tangy, citrusy taste was good enough to eat straight up off a spoon. We loved the fresh salsa/sauce on the grilled steaks, on rice, on grilled vegetables... 

I had forgotten my California marinated meat-grilling roots for a while, but I'm back on track now. We'll see this recipe again and again, the Capt. will insist on it. 


Brazilian Marinated Steaks with Chile Lime Sauce
Adapted from Cooking with Too Hot Tamales by Milliken & Feniger

4 rib-eye steaks (1 ½ -inch thick) (I used chuck steaks)
½ cup freshly squeezed lime juice
1/3 cup dry red wine
1 small white onion, chopped
4 garlic cloves, peeled
2 tsp dried oregano
1 large bay leaf
1 sprig of fresh rosemary
1 tsp coarse sea salt
1 tsp ground (white) pepper

Chile Lime Sauce (recipe follows)

Directions:
1. Place the steaks in a non-metallic pan large enough to hold them in a single layer.

2. Blitz the remaining ingredients in a blender to form a loose paste. Pour over the steaks, turning to coat both sides. Cover and chill for 4 to 6 hours in the fridge, remembering to turn occasionally.

3. Heat a cast iron grill pan over medium-high heat.

4. Remove the steaks from the marinade, shaking to remove the excess, and grill until done to taste, roughly 6-7 minutes per side for rare to medium-rare. Don't overcook the meat or it will become tougher.

5. Transfer to a platter, cover loosely with foil and let rest for 5 minutes so the juices redistribute. Serve with the Chile Lime Sauce.


Chile Lime Sauce
1 tsp coarse sea salt
1 small white onion, chopped
4 large garlic cloves, peeled
juice of 3 limes
½ bunch fresh cilantro, leaves only
tamed jalapeno rings, or maybe Sriracha, to taste (optional)

Combine all of the ingredients in a blender; blitz to form a paste. Taste and adjust seasonings.

Yields about ½ cup (also good as a sauce for chicken, pork, lamb or seafood, or slathered on a grilled panini or taco.)  


Saturday, April 11, 2015

Greens with Chicken Salad and Fruit


It's the berries...

"Superlative. This 1920s slang phrase would seem to convey the idea that berries are a choice snack or dessert. A similar phrase, 'the bee's knees,'has no such connection with reality aside from its rhyme and cute image."
It is the berries that first draw your eye in this plate of greens, but the chicken salad and vinaigrette dressing more than hold their own flavorwise. Sweet and savory tastes, varied textures and a vivid visual pop all combine to make this lunch salad an appealing winner.  
"Master Chef’s are fond of saying, “We eat with our eyes first”, but did you know there’s research to back it up?  A study in the late 1970’s showed that, when we find food more appealing, not only do we enjoy it more we also absorb more nutrients from it.  Subsequent studies have validated this finding." 
I have taken that saying to heart lately as I try to focus on healthy lunch plates that will satisfy my appetite and not feel like the dreaded "diet food" of old. Bright colors and attractive plating can make a dish look so invitingly delicious that you just know it's going to be terrific, even before the first bite. So far, it's working. 

Add some fresh herbs to the mixture of torn greens. I love the surprise flavor pop added by fresh mint, basil and parsley leaves. Change up the fruit for different flavor combinations. Tired of chicken? add tuna salad or chunks of salmon instead. Just remember, it's a feast for the eyes as well as the taste buds.


Chicken Salad with Grapes
1 1/2 cups cooked chicken, shredded or chopped
1 stalk celery, diced
4 green onions, chopped
1 cup red seedless grapes, halved
1/3 cup pecans or almonds, chopped

In a bowl toss together lightly the above ingredients with the dressing. Let the mixture marinate for 15 minutes for the chicken to soak in the flavors.

Curry Dressing for Chicken Salad
1 teaspoon Dijon mustard
1 teaspoon Garam Masala
1/2 teaspoon ground cumin
2 Tablespoons white balsamic vinegar (or lime juice)
2 Tablespoons lite Best Foods mayonnaise (or sour cream)
1 heaping Tablespoon Major Grey's chutney
3 Tablespoons oil
2 to 3 drops of Cajun Sunshine or your favorite hot sauce
Fresh mint leaves, coarsely chopped
Fresh basil leaves, coarsely chopped
Salt and white pepper to taste

 In a small bowl whisk together the mustard, Garam Masala, cumin, vinegar, mayonnaise and chutney. Slowly add the oil in a stream, whisking until emulsified. Add the remaining ingredients; taste and adjust seasonings as needed. 

Vinaigrette for Mixed Greens Salad
3:1 ratio olive oil to white balsamic vinegar
dried basil & mint leaves
honey
Dijon mustard
salt and freshly ground pepper

Whisk together to blend thoroughly. Taste and adjust seasonings. Add sparingly to a bowl of cleaned torn greens and fresh herbs; toss to coat.
The Main Event
Cover a salad plate with a fluffy bed of lightly dressed mixed greens and herbs. Add a generous scoop of Chicken Salad with Grapes. Scatter 1/4 cup of fresh raspberries and 1/4 cup of fresh blueberries over the greens. Enjoy.

Wednesday, April 8, 2015

Braised Kale and Ham Bits with Grits


There is no such thing as too much leftover holiday ham, not when this dish is so delicious and so easy to prepare. You won't think of it as leftovers, I promise. It was Monday, the traditional day to cook up a pot of Red Beans and Rice, and I was tempted in that direction. But that big bag of kale in the fridge made the decision for me; forget the RB&R and work with the pork and kale instead. Savory, salty, tangy, richly flavored and vibrantly gorgeous to look at - what's not to like about Braised Kale and Ham over Grits?! It's even healthy with a ton of nutrients: vitamin B6, dietary fiber, calcium, potassium, vitamin E, vitamin B2, iron, magnesium, vitamin B1, omega-3 fatty acids, phosphorus, protein, folate and niacin. See, healthy... healthy enough to balance the not-quite-so-healthy Cheese Grits that shared the plate.  

This dish might be reason enough to bake more ham than you need, just to have some leftover meat. Or you could buy some smoked pork or turkey parts, boil to remove some of the saltiness, and use the smoked meat instead. Substitute bacon or sausage? Of course you can, and it will still be delicious. 


One bunch of kale yields a mountain of raw greens when chopped, but cooks down into a fraction of that volume. Initially the ingredients look sufficient to feed a crowd, but will reduce to enough for 4 ample portions (unless you have are feeding some really big appetites). Serve the kale and ham over a mound of grits and it will feed 6 or more.   


Ingredients:

two-count swirl of olive oil to coat pan
1 onion, chopped
2 fat cloves garlic, peeled & sliced
2 cups cooked ham bits (or smoked pork bits, smoked turkey bits, chorizo, bacon etc.)
big pinch of salt (optional) & freshly ground pepper 
1/3 cup red wine vinegar
1/4 cup tamed jalapeño rings (Mezzetta's)
1 large bunch curly kale, cleaned & chopped
splash of chicken broth (as needed, optional)

Cooked Cheese Grits and some hot sauce to accompany 

Directions:
  1. Use a large heavy-bottomed skillet or dutch oven; lightly coat the bottom of the pan with olive oil and heat over medium-high heat. Saute the chopped onion for 2 - 3 minutes to soften; add the garlic and cook for another minute or two until fragrant. 
  2. Add the cooked ham pieces, salt & pepper, vinegar and kale; stir to mix. Cover, lower the heat and cook until until the kale is tender, roughly 15 - 20 minutes, stirring occasionally. Add a splash or two of low-sodium chicken broth if the pan grows too dry.
  3. Uncover and cook until the liquid evaporates, stirring frequently. Serve over cooked grits with your favorite hot sauce available on the side.
  

Sunday, April 5, 2015

In My Kitchen: April 2015


Happy Easter

...and welcome to my In My Kitchen post for April, a monthly blogging event sponsored by Celia of figjamandlimecordial. Drop by and take a peek inside kitchens around the world.


Travel has been the theme lately, in my kitchen and galley. If we're not coming or going, it seems we're preparing to do one or the other. Spring always means a couple of project-focused trips to the boat, and this year I squeezed in a quick flight to Southern California to visit Mom (and enjoy the warm, sunny weather).

In my kitchen ashore a hot air balloon invites flights of fancy to seashore, mountain and desert locales. I love this china pattern, "Up Up & Away" by Noritake, a set passed on from a special friend. While the design is far too busy use for photo shoots, the images are guaranteed to bring a smile every day when they greet me on the tabletop.


In my galley afloat the new cooktop has finally been uncrated and installed. The new exhaust fan assembly takes up more cabinet space, reducing the undercounter storage options, but I won't complain (much). It's a relief to have a reliable, functioning cooktop again, though it may take me a while to grow comfortable with the various burner options and controls. 


In my kitchen this week we had our choice of Easter eggs; several photo prop eggs stored on a bookcase, a plateful of Hilary's beautifully decorated egg cookies, and my Salmon Deviled Eggs with Lox Rosettes prepared for a Sunday brunch with friends. I'll admit to eating more than my share of the edible ones.


After a winter of heavy comfort food, I'm aiming for lighter, healthier meals with more fresh produce and fewer carbs. It's so tempting to bake bread and dozens more cookies than two people need, and the gorgeous photos on blogs and in cookbooks don't help my resolve. However, interesting salads and vegetable entrees satisfy the appetite enough so I don't often feel deprived. Local Spring produce is still a month or so away, but fast freight service keeps the markets stocked with beautiful fruits and vegetables. Grandma would be SO amazed!

Photo: Mixed greens and herbs with chicken salad and berries
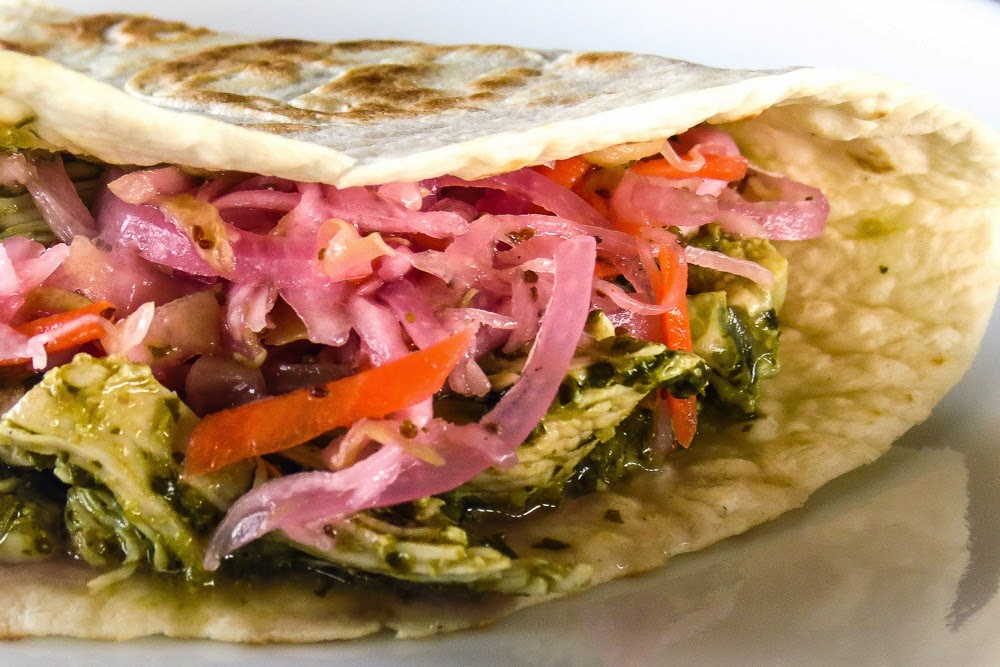
Photo: Grilled vegetable taco with pickled onions
Photo: Poblano Potato Salad with Cilantro & Lemon Zest
Photo: Roasted Cherry Tomatoes with Herbs

Sourdough waffles remain a Sunday morning tradition - it would be such a waste to throw away the discard starter! Heavy on fruit and light on syrup, they are a welcome treat no matter what the season.
I feel quite virtuous about skipping any whipped cream topping.

Photo: Fresh fruit tops a sourdough waffle
  So, what's happening in your kitchen lately?


Saturday, April 4, 2015

Crostini with Roasted Cherry Tomatoes & Herbs


Roasted tomatoes. How can something so simple taste so surprisingly good?! and why have I ignored this preparation for so long?! Whether you choose to roast Romas or select mini tomatoes instead, the results will be delicious... sweet, somewhat sticky and intensely flavorful. This is not a new idea, similar recipes have been around for ages. However it took a quart container of very ripe cherry tomatoes and a library copy of David Lebovitz's 2014 cookbook, In My Paris Kitchen, to bring this recipe into my kitchen this week.


Not that Martha, Ina, Jamie, Saveur, Food & Wine and a gazillion other sites (actually 2.27 million Google entries) don't provide tempting versions of the same dish, but Leibovitz's entertaining style and the beautiful photos drew me in. Just look at his gorgeous crostini!


The dish is so simple that it doesn't need a lengthy set of directions. The short version is:

  • Cut small tomatoes in half and fill a baking dish in a single layer
  • Drizzle with a 3-count of olive oil; add a handful of fresh herbs plus salt & pepper; toss to coat
  • Roast in a 375 F oven until juices are released and begin to thicken
  • Cool and enjoy
See... simple. Roasting concentrates the tomatoey essence, transforming even imported winter hothouse tomatoes into richly-aromatic flavor bombs. Can you tell, we loved them!?  


Roasted Cherry Tomatoes
a la David Lebovitz et al

1 ½ pounds cherry tomatoes, stemmed & halved
3 Tablespoons olive oil
2 fat cloves garlic, peeled & thinly sliced
Handful of fresh herbs (rosemary & basil)
Sea salt & freshly ground black pepper

Preheat the oven to 375 F. Arrange cherry tomatoes, olive oil, garlic and herbs in a 9x13 baking dish, or any other just large enough hold them in snuggled in a single layer. Season with salt and pepper, toss to mix well, and spread them out again into a single layer.

Place in the oven and roast for 40-45 minutes, remembering to stir occasionally, until the tomato halves wilt and release their juices, roughly 45 minutes. The juices will begin to thicken and turn golden in the bottom of the baking dish. Remove from the oven and let cool to room temperature. Lebovitz notes the tomatoes can sit up to 8 hours, and actually improve in flavor as marinate in their own juices.


Crostini
Crusty Artisan bread, cut in thick slices
Olive oil
1 fat clove garlic, peeled & halved
Fresh herbs for garnish

Preheat the oven to 350 F. Brush both sides of the bread lightly with olive oil. Place on a baking sheet and toast until just golden brown. Remove from the oven and rub generously with the cut side of the garlic cloves. Cool to room temperature.

To assemble:
Slather each crostini with some Boursin cheese, or herb-flavored cream cheese. Spoon the tomatoes and their juices over the toasts. Garnish with sprigs of fresh herbs and/or fresh basil leaves. 


Notes:

  • We used knives and forks on these wide crostini slices; they were too juicy for finger food. Smaller, one-bite slices from thin baguettes might work for casual, hand-held snacks.
  • The first pan of roasted tomatoes disappeared so quickly that cherry tomatoes immediately went to the top of the next grocery list. This might even call for a special trip. 
  • Now I can't wait to explore more Leibovitz recipes, both online and from the cookbook In My Paris Kitchen. Drat! now the library wants its copy back.
Related Posts Plugin for WordPress, Blogger...