Tuesday, April 29, 2014

Orange Spiced Apple Rolls

{#TwelveLoaves April Challenge: Oranges}


Go ahead, take a bite. Mentally savor the first mouthful of this apple-filled roll; imagine the taste, the tangy notes of citrus, the crunch of the pecans. Now inhale, mmmmmmm! the aroma alone is delectable. 

We've been back aboard for more than a week, keeping busy with boat projects and Spring outfitting and consuming interesting (okay, boring) quick-fix meals. I did bake some sour cherry rye bread (link) last week, but it was definitely time to bake some sweet treats for the Capt. With only two days left to add a recipe to #TwelveLoaves for the April theme of Oranges, the pressure was on to create something suitably orangey. Guilt entered the picture as well. It's been over a week since dock neighbor Dave inquired about sampling some baked goods, looking hopefully in my direction whenever I passed by. But wait a minute, who needs an excuse to bake? Not me, not really.


I'm not crazy wild about sweets, so a fruit-filled something was an obvious choice. I could have jazzed up our old standby, Awesome Sticky Buns, a long-time favorite of family and friends, but that felt like cheating on the #TwelveLoaves challenge. Instead I took the opportunity to adapt a new-to-me sweet dough recipe for rolled buns using Canola oil instead of butter. Thank you, PioneerWoman for the recipe suggestion. I had w-a-y too many apples left from Saturday's purchase at the Coombs Country Market, so today's filling had to include diced apples. eCurry's riff on the PioneerWoman recipe provided inspiration as well. Ginger, orange juice plus zest, and star anise joined the party for flavor, and I was ready to roll.

Well, almost ready to roll; I had started too late in the evening to finish before midnight. Oops! I settled for preparing the apple filling and the dough, popping both in the fridge and heading for bed. The dough came out of the refrigerator at 6:00 the next morning and in my chilly galley took a little over an hour to warm up, soften up, and agree to roll out. 

Note to self: This solution was more tedious than it would have been to finish the assembly and then refrigerate the filled pans. 

No matter, the result was worth the extra fiddling. These rolls were both different and delicious. RL stated for the record that he missed the ooey-gooey syrup of a traditional sticky bun, but compared this recipe favorably to a more traditional cinnamon roll. He ate two rolls after breakfast,  a sure sign of approval. 


I shared a plate of rolls fresh from the oven with neighbor Dave and his Way West crew. He came by later, to say "Thank you," and admitted to eating two while they were still warm. When pressed for a taste critique, he repeated "Delicious... delicious", and had no suggestions for improvement. 
  
The recipe is a keeper, and invites experimentation.  Smaller, individual bites baked in small muffin tins might star at a brunch buffet. Other fruit and nut combinations come to mind. Frosting drizzles would add another layer of sweetness for anyone craving sweets. But for today, Orange Spiced Apple Rolls were perfect as is, thank you.


Orange Spiced Apple Rolls
adapted from ThePioneerWoman and eCurry recipes
  For the dough:
1 cup milk, scalded
1/4 cup sugar
1/4 cup Canola oil
1 heaping teaspoon active dry yeast
2 1/2 cups AP flour, divided
1 teaspoon salt
1/4 scant teaspoon baking soda
1/4 heaping teaspoon baking powder
1 tablespoon Apple Pie spice (Penzey's)


For the apple filling:
2 Tablespoons butter
4 cups apples; peeled, cored & diced small
1/2 cup brown sugar
1 teaspoon grated fresh ginger
zest of 1 small orange (grated or slivered)
juice of 1 small orange (or 1/4 cup orange juice concentrate)
2 star anise

1 heaping cup pecans, toasted & rough chopped
1/2 stick (4 Tbs) melted butter

Optional syrup to drizzle on top:
Sugar dissolved in orange juice for simple syrup
Granulated sugar to sprinkle

Prepare the dough:
  1. Whisk in the sugar and oil into the scalded milk until the sugar dissolves. Let cool (under 100 F). Add the yeast and watch it bubble a bit, then add 2 cups of the flour and stir gently to mix. Cover and rest for 1 to 2 hours (this gives gluten development a head start).
  2. Sift together the remaining 1/2 cup flour, salt, baking soda, baking powder and Apple Pie spice; add to the dough. Knead to fully incorporate these new additions.
  3. Divide the dough in two, forming a ball with each half. Cover and let rest for 15-20 minutes.
Prepare the filling:
  1. Use a non-stick pan to avoid scorching. Melt the butter over medium-high heat until it bubbles; add the apples and toss or stir to coat each piece. Add the brown sugar, fresh ginger and orange zest, stirring until the sugar melts. Add the orange juice and star anise and simmer over low heat, stirring frequently, until the fruit softens and the liquid thickens.
  2. Scoop the mixture into a bowl, remove the star anise and let cool. (You can prepare this a day ahead, but it will tempt you to sample spoonful after spoonful.)

Assemble the Rolls:
  1. Place one of the dough balls on a lightly floured surface and roll out into a rectangle - the larger the rectangle the more filling you can use.
  2. Brush with half of the melted butter. Distribute half of the apple filling evenly over the dough; then scatter half of the pecans on top of the apples.
  3. Begin with a short side and roll up into a firm cylinder. Press the long edge to seal as you finish. Use floss, thin string or an oiled knife to divide into 6 to 8 pieces.
  4. Place each piece, cut side down, in a greased baking pan. Leave a little space between each slice; they will rise as they sit and putt even more as they bake.
  5. Repeat with the second ball of dough.
  6. Cover; let rise until they lighten and puff to nearly double.
  7. Bake in a preheated 375 degree F oven until golden brown, and they sound hollow when tapped. (33 minutes in my oven). You may want to cover in foil for part of the baking to avoid over browning. 
  8. Serve warm, plain or drizzled with an orange-flavored simple syrup and dusted with sugar.
  9. Note: To delay baking or bake in 2 batches, hold the dough in the fridge unfilled or assembled, but let it return to room temperature before continuing.

Friday, April 25, 2014

No-Knead Sour Cherry Lemon Rye Bread with Nuts


Foodie thoughts flit through my brain 24/7, not taking up much space but continually popping up like the bubbles in a boiling pot. Lately I have nudged these thoughts into a corner, ignoring the urge to cook while we organized boat projects and stowed boat "stuff". 

I was welcomed back aboard the boat this week by a marina neighbor D who wondered how soon to expect some baked goods. Hmmm, nice to be missed, but now the pressure is on to deliver something, and soon. It's fun to share baked treats, to get feedback about new recipes, and sharing keeps us from developing rapidly expanding waistlines. One quick batch of Cranberry & Orange Shortbread Squares flew out of the galley, delivered to the marina office crew, but D is still waiting for his plate of cookies, cinnamon buns or baked something

Should my next baked something be sweet or savory? Decisions, decisions... I wavered, settling on bread with a mix of sweet and savory add-ins. My breads usually feature sourdough and/or unbleached white flour, but two small bags of rye flour begged to join the party. The Capt. loves sour cherries and lemon zest added to sourdough leaves (link), so those items plus a handful of pecans went into the mix. 

The King Arthur Flour website holds an intriguing recipe for No-Knead Chocolate-Cherry-Pecan Bread, unusual both in ingredients and method. I gambled on the method, after all KA is known for great baking, but could not embrace the idea of chocolate in rye bread. No courage... what can I say? The unusual (to me) method involved adding yeast twice, once for each rise. I was skeptical; while it seemed to work just fine, I don't know whether it was essential or not. Plenty of gluten strands had developed by the end of the first rise.


Dividing the dough in half provided 2 small loaves, perfectly sized for my red bread pot. The shaped loaves rested in parchment paper-covered skillets for the second rise.


A few cherries had migrated outside the dough ball and scorched on the bottom of the loaf. Was the oven too hot? Was the rack set too low? These are new issues to investigate.


No problem, we easily polished off half a loaf during a taste-test, trimming off the few offending burnt cherries on th bottom. We nibbled on one slice plain, another slice buttered, the next slice buttered and sprinkled with sea salt (my favorite), and finally buttered and spread with jam. YUM to all 4 bites!


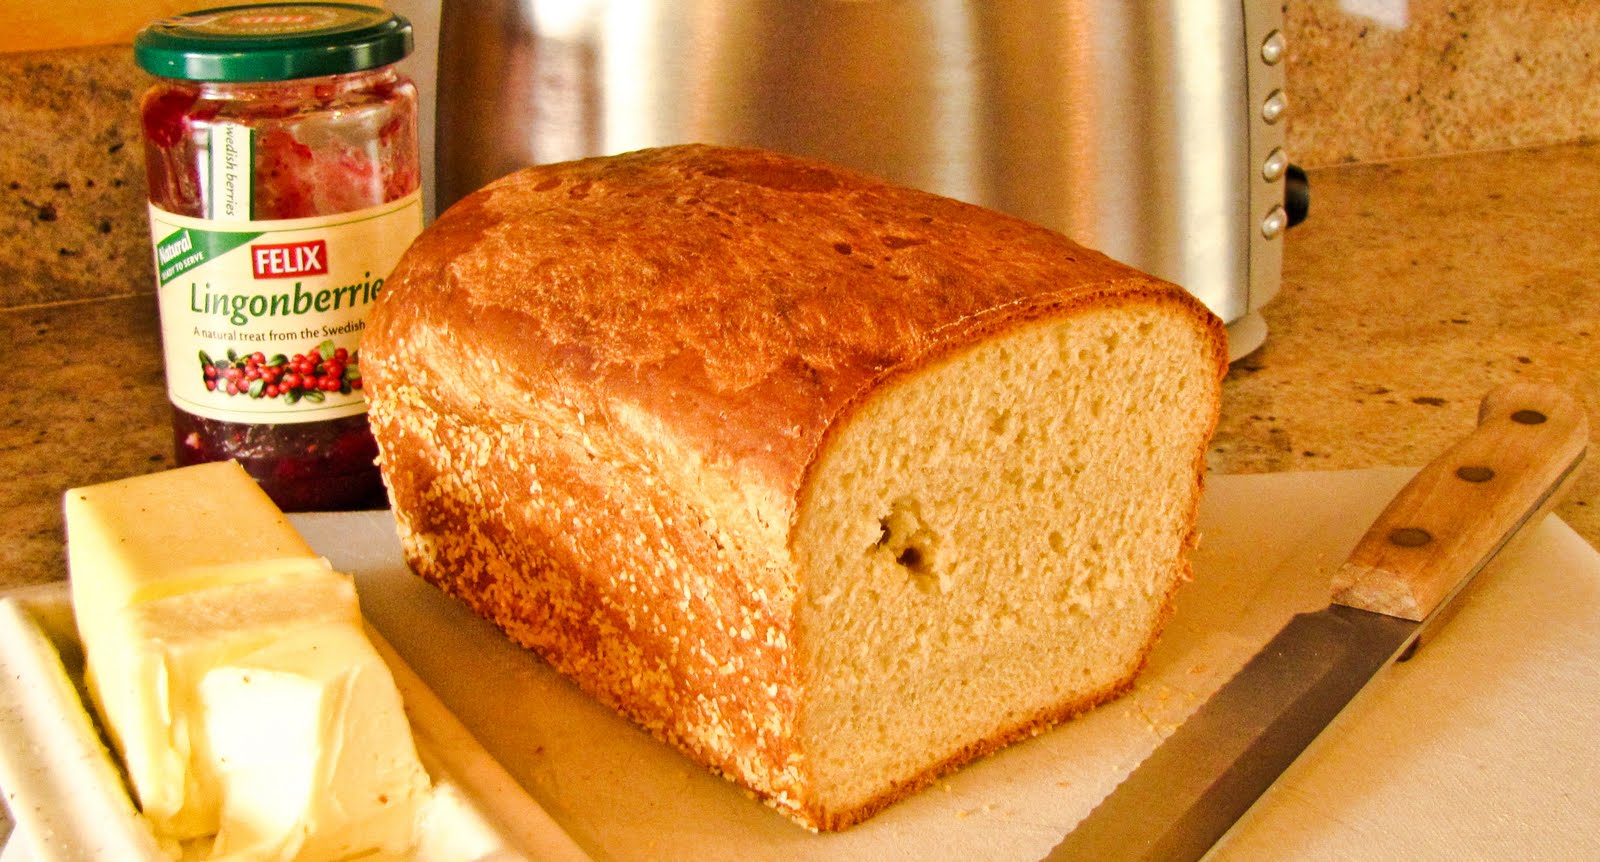
The result: really tasty bread, plain or toasted, with just a hint of lemon and rye. Of course RL, aka Mr. Sweet Tooth, preferred his slathered with butter and cherry preserves. You really can't pass up a double cherry flavor.


Changes? next time I'll add a smidge of sugar to the dough and incorporate the cherries, zest and nuts at the beginning. I will also raise the oven rack one level higher and try baking at 425 instead of 450.


No-Knead Sour Cherry Lemon Rye Bread with Pecans
Adapted from a King Arthur Flour recipe for a chocolate holiday bread.

Place the following ingredients in a large mixing bowl:
3 cups AP flour
1/2 cup light rye flour
1/2 cup dark rye flour
2 teaspoons salt
1/4 teaspoon instant yeast
1 1/2 cups cool water (+2-4 TBS as needed for soft dough)

Stir everything together to make a soft, shaggy dough. Cover the bowl with plastic wrap. Let the dough rest overnight at room temperature, 12 to 16 hours recommended. The dough will expand... slowly.

Add the following:
3/4 cup chopped dried sour cherries (soaked in the juice of 1 lemon, then drained)
zest of 1 large lemon
3/4 cup diced pecans, toasted
1/2 teaspoon instant yeast
  • Knead the fruit, nuts and yeast into the soft dough, working to keep these added ingredients on the inside of the dough. 
  • Use the stretch-and-fold or envelope-folding technique to form the dough into a slightly flattened disk and place it on parchment paper-lined bowl or pan that is roughly the same size as the covered Dutch oven or baking dish you will use in the oven. Poke in any exposed nuts or fruit to prevent scorching when you bake (especially on the bottom!) Cover the dough again with plastic wrap you have coated with cooking spray. 
  • Let the dough rise a second time until it is noticeably expanded, 2 to 6 hours depending on your kitchen's temperature.
  • Preheat the oven to 450 degrees F (425 in my oven) as the dough finishes the second rise. Preheat the Dutch oven and its lid at the same time.
  • When ready to bake, remove the pot and lid from the oven. Quickly take the plastic wrap off of the dough, use the corners of the parchment paper to lift the dough out of its rising container and place it in the preheated pot. Cover and return to a low shelf (but not the bottom shelf) in the 450 F oven (425 in my oven). Bake for 35 minutes. Remove the cover and bake for another 25 minutes until the crust is golden brown and the interior registers 200-205 degrees on an instant-read thermometer. Return to the oven if necessary. Transfer to a baking rack to cool completely. 
"Tempting as it may be, DO NOT slice the bread until it's completely cool! Doing so will make the slides side of the loaf gummy."
The warning above came straight from King Arthur - and who am I to argue with the king?! So we waited, and waited some more, impatiently waited for the bread to cool.

Yield: 1 large boule
I divided the dough in half to accommodate my small Dutch oven and reduced the uncovered baking time by 10 minutes. 

Friday, April 18, 2014

Chicken-Broccoli Casserole

Revisiting an old classic.


Dust from a recent construction project sneakily infiltrated every nook and cranny throughout the house, so Spring cleaning included a lot more territory than usual this year. I left the kitchen cabinets until the end, uppers and lowers including several enclosed bookshelves. The bookshelves certainly made it seem more like playtime instead of a dreaded chore. I rediscovered a few treasures, books I hadn't cooked from or even read through in a long time. Waves of memories flooded over me when I pulled a well-used, spiral-bound, 1974 cookbook off a top shelf where it had rested, out of sight, for ages. Giggles followed after I scanned the title and cover photos: Get It On In The Kitchen pictures a variety of produce, seafood and one braided loaf tastefully draped over a naked female form. Oh yes, I definitely remember that book.


Photo: Now this is a book cover designed to attract attention
Local PNW authors John Lysaker and Ray Gorder note they designed the book for people who like to entertain,
"the kind of folks who enjoy feeding their friends and who tend to end up talking and laughing in the kitchen."
Don't most good gatherings end up in the kitchen? The authors included recipes from both locals and friends across North America, plus over 100 recipes from some interesting notables of the era... an eclectic group of contributors. Casual entertaining may have changed a bit in the past 40 years, but recipe ingredients and descriptive commentary have changed far more. Quinoa, arugula, sriracha, umami and gluten-free baking were not mentioned in any of the recipes, not even once.

Knowing that I write all over my cookbooks I flipped to the index at the back of the book where dozens of recipe titles highlighted with my yellow magic marker vied for attention.  Score! the one that really stood out was a homestyle version of Chicken Divan, an American classic said to be invented in the 1930's at Manhattan's Divan Parisien Restaurant. Oh my, that dish has appeared at so many meals over the years that I can't remember when I last referred to the written recipe. Today more health-focused cooks might prepare a proper Mornay sauce with mushrooms instead of preparing the canned soup/mayo version noted below, but this casserole was a major hit "back in the day." 


It's dated but Chicken-Broccoli Casserole still comes in handy after a chilly, rainy day of fishing in a small open boat in SE Alaska. We welcome a quick, tasty meal upon return to the big boat... comfort food, right now, please!  
   
Here's the process in photos:


Step 1: Precook the chicken breasts and broccoli spears.

Step 2: Arrange the broccoli in a baking dish, stems to the center.

Step 3: Place the halved chicken breasts down the center of the dish.

Step 4: Mix the sauce and pour over the chicken breasts.

Step 5: Scatter shredded cheese and seasoned bread crumbs over the sauce.

Step 6: Bake at 350 degrees F for 25-30 minutes.


Chicken-Broccoli Casserole
based on two similar recipes in Lysaker's Get It On In The Kitchen

2 chicken breast halves
1 small head broccoli, separated into large spears
1 can cream of mushroom soup
1/2 cup mayonnaise
juice of 1/2 lemon
1/2 teaspoon curry powder
sprinkle of cayenne (or chipotle chili powder) optional
1/4 cup sharp cheddar cheese, grated or shredded
2 Tablespoons Italian seasoned bread crumbs

Poach the chicken breasts in lightly salted water; remove skin and bones. Set aside to cool. (OR use breasts and thighs from a precooked deli chicken.)

Steam or microwave broccoli spears until barely tender; set aside to cool. (OR use 1 package of frozen broccoli spears.)

Preheat the oven to 350 degrees F.

In a small bowl mix together the soup, mayonnaise, lemon juice, curry and cayenne (if using).

Place broccoli into a shallow casserole with flowery tops on the outside, stems arranged to the middle. Line chicken breasts in a row down the center of the casserole over the broccoli stems. 

Pour or spoon the sauce over the chicken, but leave the broccoli tops uncovered. (You will have sauce left over to use on another casserole or with vegetables & rice.) Sprinkle the grated cheese over the sauce. Sprinkle the bread crumbs over the cheese. Bake in a preheated 350 degree F oven until warmed through and the cheese topping begins to bubble and brown, approximately 20 to 30 minutes. (Adjust time according to the degree of crunchiness desired for the cheese topping.)

Monday, April 14, 2014

Stacked Crepes with Ginger Chicken Filling and a Coconut Sauce

Chatti Pathiri {Daring Cooks Challenge}


The April Daring Cooks Challenge was brought to us by Joanna from What's On The List. She taught us all about Pathiri and challenged us to create our own version of this inspirational Indian dish!


It has been almost a year since I have cooked with the Daring Cooks, so I took some time to catch up  with this active group, skimming many month's worth of challenges and enjoying a gazillion posts. Back in the kitchen after surgery in March, I had weeks to think about this month's topic, Pathiri, and consider my own version. With some interesting ingredients to play with - Crepes - spices - chicken filling - coconut sauce - I thought, oh yes, this would be fun!

I'm familiar with the stacked enchiladas of West Texas and New Mexico, I've made both savory and sweet versions of southern Italian stacked crespelle, but stacked pseudo Pan-Asian crepes would be a new treat. 

Chicken and crepes can be bland, but the hefty dose of ginger plus some garam masala, garlic and ground coriander popped up the flavor nicely. 


Photo: Fresh ginger seasons the minced, cooked chicken

Coconut milk added subtle sweetness. Green onions and kale provided both color and flavor bite. Pine nuts added a necessary crunch, rescuing what might have been a boring, too-soft mouthful. 


Photo: Pine nuts, green onions and kale add bite and crunch

The delicious result was an example of the total being greater than the sum of the parts (or however that saying goes). Three of us loved this dish for lunch, and H. cheerfully took the leftovers home... now that's a sign of success.

Photo: Filling scattered on top of the first crepe


Photo: 12 crepes stacked, filled and ready for the oven

Photo: Filled, stacked savory crepe cake fresh from the oven

Photo: 12 layered crepes in this stack - go ahead, count them.

Stacked Crepes with Ginger Chicken Filling

serves 4 as an entree, 8 as a first course

For the crepes: 
3 large eggs
3/4 cup 1% milk
1/2 cup water
1 cup flour
3 Tablespoons melted, unsalted butter
1/2 teaspoon salt
additional butter for the crepe pan

1.  Use a blender or food processor to whirl the eggs, flour and milk until smooth. Scrape down the sides as necessary. You can whisk it by hand, but it is very tedious that way.
2.  Choose a crepe pan or flat-bottomed frying pan and prewarm it over medium-high heat. When the pan is hot brush the bottom lightly with melted butter.
3.  Before the butter browns pour a premeasured amount of batter into the hot pan; quickly tilt and swirl to coat the bottom. An 8-inch pan will handle 3 1/2 to 4 tablespoons of batter per crepe.
4.  Cook until the edge is lightly browned and the surface looks dry, roughly 30 to 60 seconds.
5.  Run a wide metal spatula under the crepe’s edge and shake the pan a bit to make sure that the crepe is loose. Use the spatula to turn the crepe over and brown it lightly on the second side, about 10 to 15 seconds. Slide the crepe onto a flat plate, or tip the pan to release the crepe.
6.  Repeat with the remaining batter, stacking crepes on top of each other, separated with waxed paper, as you finish each.


For the filling:
1 large chicken breast; poached, cooled & minced
3 teaspoons minced fresh ginger
2 cups shitake mushrooms; soaked, drained, chopped
8 green onions, white & green parts, minced
1/4 cup pine nuts
1 large leaf kale, stemmed and minced
1 teaspoon garlic powder
1 teaspoon garam masala
1/2 teaspoon ground coriander

Use a fork and mash the ginger into the cooked, minced chicken. Add the remaining ingredients and mix lightly to combine. Set aside.

 For the sauce:
1 can coconut milk
1/4 cup ground almonds or almond meal
1 teaspoon minced fresh ginger
1/2 teaspoon coriander

(Plus 2 teaspoons melted butter for the assembly process.)
Lime wedges, optional 

Whisk lightly all ingredients, coconut milk through coriander, until well combined. Set aside.

To assemble:

  1. Brush 1 teaspoon melted butter on the bottom of a non-stick 8-inch skillet. 
  2. With a second brush, coat both sides of a prepared crepe and lay flat on the skillet. Scatter 1/4 cup filling on the top of the coated crepe. Coat both sides of another crepe with sauce and lay flat atop the filling atop the first crepe. Repeat until you run out of filling and crepes, ending with a coated crepe. I used 12 crepes in all.
  3. Brush the top crepe and any exposed edges around the perimeter with the remaining butter. (I'll skip this step next time) Pour the remaining sauce over the top of the stacked crepes (note, some will run down the sides and pool at the bottom).
  4. Bake in a preheated 350 degree F oven until the sauce is absorbed,or thickens considerably. This took 35 minutes in my oven.
  5. Remove from the oven. Place a large serving platter or dish over the top of the skillet and invert quickly and carefully. Slice into wedges and serve immediately with a slice of lime. (OR chill and serve cold.) 

Thursday, April 10, 2014

Lamb Ragu with Mushrooms and Capers


I have eaten very little meat since a recent surgery and my meat-loving husband has been so good natured about this dietary change. It was time to treat him to a hearty, meaty main dish. But what?

One lonely package of ground lamb sat on a freezer shelf, inviting me to create something wonderful. I'm sure I had a brilliant idea when I purchased the meat last month, but that was weeks ago and the plan has vanished. Today I was indecisive, waiting to be inspired, maybe even hoping someone else would deal with it. Well, that didn't happen, so I considered some familiar possibilities: avgolemno soup with lamb meatballs, Merguez sausages or mini meatloaves, lamb burgers, stuffed grape leaves, papas rellenas, ... No inspiration yet... sigh.

So I traded thoughtful decisionmaking for action, raided the refrigerator, grabbed some produce, heated a pan and just started cooking. It helped that the pantry was fairly well stocked. 


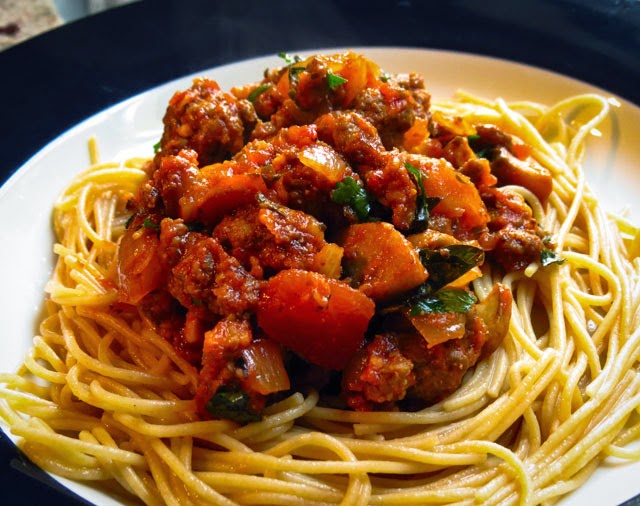
Capers and feta cheese balanced what might have been a too-heavy lambiness, the mushrooms contributed bulk and soaked up the flavors nicely. The sauce came together easily, a good thing since I didn't do much taste-testing along the way, and was rewarded with a two-thumbs up review from RL. I enjoyed a smaller bowl of pasta with just a smidge of the meat sauce and still agreed, this was a very successful improv.

Half of the sauce remains, an invitation to fill a toasted burger bun or warmed pita round... or bake it with cheese and flat pasta sheets in a lasagna dish... or use it to top a pizza... or... 


Lamb Ragu with Mushrooms and Capers
sauce for 4 entree servings

1 tablespoon olive oil
1 tablespoon butter
2 cups fresh mushrooms, cleaned & chopped
1/2 large onion, chopped
1 clove garlic, minced (or use garlic powder)
1/2 teaspoon salt
1/2 teaspoon freshly ground black pepper
1 pound ground lamb
1 tablespoon dried mint
3 to 4 cups marinara sauce
1 generous tablespoon capers, rinsed & drained
1/4 cup Parmesan cheese, crumbled
1/4 cup feta cheese, crumbled
1/2 cup fresh basil, julienned
1/2 cup fresh Italian parsley, rough chopped
cooked whole wheat pasta to serve 4

  1. Warm 1 tablespoon olive oil and 1 tablespoon butter in a large skillet over medium heat. Add the chopped mushrooms and cook until the 'shrooms turn golden brown. (Be patient and wait for them to release their juices, let the liquids cook down and evaporate, and eventually the mushrooms will begin to caramelize.) Remove from the pan with a slotted spoon and set aside.
  2. Raise the heat under the pan to medium high; add the chopped onions and cook until they begin to soften. Add the garlic, salt and pepper, and dried Italian spices and cook until the onions are translucent and begin to brown. Remove from the pan with a slotted spoon and set aside.
  3. In the same skillet over medium high heat cook the ground lamb until browned, breaking up the large chunks as it cooks. Use a large cooking spoon and remove most of the rendered fat from the pan.
  4. Return the mushrooms and onions to the skillet. Add the marinara sauce, dried mint and capers; simmer, covered, over low heat until the flavors have blended. Taste and adjust seasonings. 
  5. Add the cheeses and fresh herbs; stir to mix. Serve over a nest of cooked long-strand pasta OR add cooked, short tube pasta to the pan. Serve immediately.

Wednesday, April 9, 2014

Banana Smoothie with Kale


A breakfast drink concocted with bananas and kale, totally packed with vitamins and minerals, should deliver a great start to the day... emphasis on should. I enjoy bananas and kale separately, so why was this smoothie such a flop? 

It could have been an attitude issue; for years I've avoided drinking kale anything out of pure stubbornness. "Oh, Dee, you really have to try a green smoothie, it's SO good for you!" Hah, the more I heard it, the more I resisted. 

It might have been the texture, a coarse, grainy feeling that was faintly noticeable and annoying. Smoothies are supposed to be smooth and creamy, right?

Did my blender let me down? Do I need a VitaMix? No, I think I'll stick to delicious braised kale for breakfast, and tasty raw kale for salads at lunch, and let my smoothies stay kale-free.

Declaration: This smoothie may be super-healthy, even semi-palatable, but it will never be my favorite breakfast choice. How about you, do you have a favorite green smoothie? I'm open to suggestions.


Banana Smoothie with Kale

1 large or 2 small bananas, peeled, chopped & frozen
1 cup raw kale, cleaned & stems removed 
   (or substitute spinach instead)
1 teaspoon vanilla
1 Tablespoon maple syrup
1 1/2 cups 1% milk (or almond milk)

Add all ingredients to a blender and whiz until you have a thick, even mixture. Add more liquid as needed to thin to desired consistency.

Tuesday, April 8, 2014

Festive Fruit Cubes


These fruit-filled cubes can turn almost any beverage into a party-in-a-glass. Pop a few cubes into a clear glass and add some Prosecco or white wine, maybe Sprite or Sangria, or plain fruit juice, or... whatever, and you'll smile at the result. 

I had some odds and ends of fresh fruit in the refrigerator, left after creating a colorful green salad with fruit. The small amount of leftover fruit could have gone into a smoothie or topped a dish of yogurt, but I really just wanted it out of the fridge, right now. 

Pop a few blueberries, raspberries and sliced grapes into each section of a plastic ice cube tray and top with water. Freeze for several hours until hard. Release and store in an air-tight freezer bag until ready to use.


Next time I might cover the fruit with white cranberry juice before freezing to add flavor without diluting my drink.


Cheers! Prosit! Slainte! Salud! Skaal! Kampai! Na zdravie! 


Monday, April 7, 2014

Five-Year Blog Anniversary

Let's Celebrate!


It has been five years to the day since the first post (link) appeared here on OTM-In the Galley, just an introductory paragraph without photo or recipe. Ahhhh yes, I've grown wordier over time. <grin

I've been crazy about cooking for decades and am happy to share recipes. By 2009 I finally realized that posting online could replace writing out a recipe card by hand or even sending a file via email, so I determined to give blogging a try. That first post presented a simple goal, to share recipes with accompanying photo(s) for as long as it remained a fun activity.
"OTM-In the Galley is a solution to sharing my foodie enthusiasm with anyone who cares.  It might be a catalyst for improving my photography - or it might have the shortest blog life ever recorded if it feels too much like work. Anyway, welcome to my galley." 
Five years later blogging is still fun, my photography shows some improvement and I've met scads of terrific, interesting people online who share the same enthusiasms. Some days the writing flows, on other days it's more of a challenge. The number of posts per month varies with our activity calendar and depends on wi-fi access when we're afloat, so there's been no set publishing schedule. Fishing or crabbing, photographing whales or tracking a grizzly bear along the shore in my kayak are activities that often compete for time with my writing/editing efforts. No surprise, I head outside and the writing and editing wait until later, sometimes much later.

I'm amazed at the growing page view count; over 100,000 views from people all over the world. Who are you readers, and how did you find OTM-In the Galley? Whoever you are, I am thrilled that you visited and hope you'll return. Leave a comment every now and again, and I'll return the favor.

Blogger Statistics indicate most viewers arrived via a Google search or a Pinterest link. The most-visited posts for each of the previous years were:

2013: Soft Pretzel Bites, Buns and Sausage Rolls


2012: Fruit and Nut Crisps


2011: Beet and Beef Borscht


2010: Chicken Marbella


2009: English Muffin Toasting Bread


So much for history, now it's time to quit looking back and get on the move - in the galley of course! Thanks for visiting my blog. SeattleDee

Saturday, April 5, 2014

Eggs in a Lacy Nest


Does this look familiar? It might if you read seen my earlier three-recipe post for an April 2011 Daring Cooks' Challenge: Edible Containers. Today, two weeks before Easter, with the inevitable excess of hard boiled eggs, seems the perfect time to revisit this recipe. 

Stuffed eggs, deviled eggs, are standard fare in many kitchens but the twice-cooked preparation sets these beauties apart. Imagine eggs stuffed with your favorite filling, cooked cut-side down in butter until the edges crisp and caramelize.... mmmmmm, delicious! Serve them nestled on a bed of lightly-dressed greens inside a frico nest for a first course worthy of company... or just plate a few to enjoy all by yourself. Try them; if you love eggs you will thank me for this repost.


Prepare the eggs:
Cook the eggs, cool completely and peel carefully. Use your favorite savory deviled egg stuffing recipe or search online for a new twist (link). I  favor a Dijon mustard/mayo combination with a hint of dill pickle relish, capers and some minced green onions and parsley blended in with the egg yolks. Taste and adjust to suit your own palate. Fill the empty halves only to the top of the whites, patting the stuffing down gently and leveling the surface.
(You can stuff the eggs a day ahead and hold, covered, in the fridge until you are ready to sauté them, a nice do-ahead feature when serving a crowd.)


Bake the cheese nests: 
Mound 1/8 cup grated fresh Parmesan on a silpat-covered cookie sheet; tap down with a tablespoon and smooth into a thin circle.
Bake at 375 F until golden and bubbly, but don’t overcook to the browned stage.
Remove from the oven; quickly mold over an upturned glass, or place inside a muffin tin and gently press down with the bottom of a thin glass to form into a bowl.
Let it cool until firm, about 5 minutes.
Repeat for more nests. 
(These should hold, covered, at room temperature for a day, though I've not tried it. Kitchen elves would eat them if left unattended in my galley.)


Saute the stuffed eggs:
Heat a pat of butter in a skillet and sear the flat, filled side of the eggs until just browned. Do not cook the rounded side. Carefully remove the eggs from the pan and place, filled-side up, on a crispy cheese nest filled with lightly-dressed baby greens. 


This sautéed egg sits atop a crisp bacon rosette, adding a special note to a brunch dish... and who can resist bacon? A sprinkle of paprika would add a colorful finish. 


Thursday, April 3, 2014

German Potato Salad - the family version.


What is sweet, sour, tangy, loaded with bacon, and both smooth and crunchy all in one bite? Of course, it's Kartoffelsalat, Mom's German potato salad. Just thinking about it returns a craving for this satisfying side dish. It's cool-weather comfort food, though at times it has also been a popular item at summer evening potlucks on the dock.

Why haven't I posted this recipe before now? Maybe I take it for granted, it has been a family favorite forever. Two generations, often three, expect this warm potato salad to accompany homestyle entrees like pork schnitzel, kraut-roasted pork, grilled wurst, braised rouladen, etc. Or forget the accompaniment idea, RL finds German potato salad a satisfying lunch all by itself, it's just that good. 

Mom was born in Austria, and this recipe is based on her version of German Potato Salad. Hmmm, does that make it an Austrian-German Potato Salad, or an Americanized version of a Bavarian regional recipe. Whatever! authentic or not, we love it. Be aware, I  typically don't measure ingredients when preparing this dish, adjusting by taste and consistency as I go to find the right proportions and occasionally adding other ingredients. You'll find it quite adaptable too as you balance the sweet and sour to suit your taste.

The recipe below records this week's dish, with measurements noted as close as possible to account for several rounds of "taste, then adjust." 

Mom's German Potato Salad
4 generous servings

4 thick strips bacon (not maple flavored)
1 yellow onion, chopped (approx 1 cup)
4 stalks celery, strings removed, diced
2 tablespoons flour
1 cup water 
1/2 cup cider vinegar
1/2 cup granulated sugar
1 generous teaspoon celery seed
kosher salt and fresh cracked pepper, to taste
fresh Italian parsley and green onions (optional)
5 fat Yukon Gold potatoes

Directions:
  1. In a skillet, cook the bacon until crisp. Drain on paper towels, chop and set aside. Save 2 to 3 tablespoons of the fat.
  2. Reheat the skillet of bacon fat over medium heat and cook the onion and celery until softened.
  3. Sprinkle flour over the top of the vegetables; stir to incorporate. Add the water, vinegar and sugar and cook until the sauce thickens. (It will be fairly loose and soupy, just what you want since the potatoes will absorb quite a bit of the liquid.) 
  4. Add celery seed, salt and pepper; taste and adjust.
  5. While making the sauce cook the potatoes until barely tender. Peel and dice or slice into bite-sized chunks. Add to the sauce while still warm and gently fold in with a heat-proof spatula.
  6. Let the potatoes rest in the sauce for a few minutes; stir again; taste and adjust seasonings and the sweet:sour ratio.
  7. Top with parsley and green onions (optional) and serve warm or at room temperature. Enjoy.


Related Posts Plugin for WordPress, Blogger...