Showing posts with label SourdoughSurprises. Show all posts

Sunday, September 20, 2015

Sourdough Crumpets


Crumpets anyone?
"Crumpets are the quintessential, afternoon tea treat, served warm with lots of butter. The soft, spongy crumpets we know today, reputedly, come from the Victorian era and are very different from early, flat griddle cakes. It is the extra yeast in the batter which creates the soft texture and the myriad of little holes on the top (so perfect for soaking up the butter)." link
Crumpets have never graced a plate in my kitchen. I've read references to English tea and crumpets, but have never held or tasted one. The commercial packages of crumpets at the local grocery look uninviting, more like wimpy, anemic cousins of the extra-crispy English muffins that I love. Now how's that for an unfair, blatantly uninformed opinion?! Sourdough Surprises chose Griddle Breads for the September 2015 challenge, prompting  me to give this griddled yeast bread a try. 

The ingredient lists and directions I found in various online recipes were simple enough. Crumpets sounded more like fat pancakes or thin English muffins - easy peasy, right? Well, not quite. As with so many seemingly simple things, the devil is in the details. Batter consistency, the amount of batter per crumpet ring, griddle temperature and the decision to flip or not to flip can drastically alter the appearance and texture of these round, crater-speckled little disks. Success is apparently to be measured by the quantity of holes on the upper surface. 

I chose an old 1991 recipe I found online at the King Arthur Flour site (link). In my experience, King Arthur recipes rarely fail. Old Faithful, my sourdough starter, was refreshed, rested and ready for action, hanging out at room temperature on the counter near the stovetop. A heavy, well-seasoned cast iron, smallish mixing bowl, a silicone whisk and six metal muffin rings rounded out the equipment list. Ready, set go!


The simple batter called for four ingredients: 1 cup of sourdough starter, 1 teaspoon sugar, 1/2 teaspoon salt and 1/2 teaspoon baking soda. Poof! a gazillion carbon dioxide bubbles form to fluff up the batter. My starter is fairly stiff, so I added 3 tablespoons of milk to loosen up the batter to a more pancake batter-like consistency. Why milk? I had read somewhere online that crumpets typically include milk whereas English muffins call for water. 


Lightly grease the griddle or heavy skillet and the inside of each metal ring to minimize sticking (use well-washed tuna cans if you don't have crumpet rings). Preheat the pan and the rings for several minutes over low to low-medium heat on the stovetop. (I used a setting of 2.5 out of 8 on my electric range)   


Ladle or pour some batter into the greased rings, filling no more than half way up (a scant 1/3 cup in each). This allows some space for the batter to rise. Cook over low to low-medium heat until the tops are set and bubbles stop forming (4-5 minutes on my range). Remove the rings and flip; briefly cook the second side for a minute or two to set up and add color. 


Set the cooked crumpets aside, regrease the metal rings and repeat the above cooking steps with the rest of the batter. I added a few more tablespoons of milk to to the remaining mix to see if a smaller quantity of a looser batter would produce more holes. This time I ladled only 1/4 cup of batter into each ring.


This second batch produced thinner crumpets with fewer holes. What? The looser-batter test results were inconclusive, since the baking soda may have lost its lifting power oomph over time. No problem with taste however, these thinner disks still rated two thumbs up with RL as he ate one straight from the skillet.  


Thin crumpets are tasty enough hot off the griddle, but are even better when toasted, rendering them fairly toothsome and crispy throughout. Fatter crumpets emerge from the toaster with crisp exteriors and soft, almost fluffy interiors. Blame it on my existing love affair with English muffins, but I like to split the fat muffins in half before toasting to crisp up the insides a bit more and minimize the soft texture. Add butter and honey and you might discover that crumpets are so good you can't eat just one. Go ahead, see for yourself. Then click over to Sourdough Surprises and check out this month's griddle cakes from other kitchens.

Sourdough Crumpets

recipe from King Arthur Flour
yields 6 crumpets

1 cup sourdough starter at room temperature
1 teaspoon granulated sugar
1/2 teaspoon salt
1/2 teaspoon baking soda dissolved in 2 tablespoons warm water or milk

  1. Lightly grease the heavy griddle or skillet and the inside of crumpet rings (or well-washed tuna cans). Preheat on stovetop over low to low-medium heat.
  2. Place the cup of starter in a small mixing bowl. Sprinkle the sugar and salt over the starter and stir in.
  3. Dissolve the baking soda in 2 tablespoons of warm water and add to the starter. Whisk or stir into the starter. When the batter lightens and fluffs, you are ready to cook.
  4. Ladle batter into each ring, filling no more than half full. Cook over low heat until the top sets up and bubbles quit forming, usually 4 to 5 minutes or more. 
  5. Remove the rings and flip to cook an additional minute or two on the second side.
  6. Set aside on a baking rack while you cook up the rest of the batter. 
  7. Toast and spread with butter and/or honey. Enjoy!

Tuesday, January 20, 2015

Green Tea Sourdough Bao (Steamed Buns)


The January topic for Sourdough Surprises is Bao, those filled and fluffy steamed buns that are often found on dim sum carts in Chinese restaurants. Years ago I baked some tasty Char Sui Bao (BBQ pork filled buns) for a Daring Cooks challenge, but for some reason never did revisit that recipe. Here was an opportunity to try again, to tweak the previous Bao recipe a bit by relying solely on my sourdough starter for the rise and steaming the buns instead of baking them. 

The change list expanded after spotting an intriguing photo for Green Tea Bao with Sweet Filling (here). Matcha powder? That was an unfamiliar ingredient, but several online sources mentioned grinding green tea leaves to substitute for the commercial product. I could do that. Instead of driving to Uwajimaya's I grabbed an old coffee grinder, a metal sieve and a canister of loose green tea for my DIY version of matcha. 

Sweet sourdough buns suggested a sweet filling, sweet but not so sweet as to overwhelm the tea taste. Flavor pairings suggested online included citrus, dark chocolate, nuts, various berries and mint. I pulled Nutella, minty dark chocolate chips, raspberry preserves, coconut shreds and ground walnuts out of the pantry to try different combinations.    

My starter was frothy and peppy but the oddly colored Bao dough rose very slowly overnight on its first rise. I began to have doubts: should I have added some commercial yeast, or at least tossed in a bit of baking powder? Too late to worry, just press on.

The dough was agreeable to work with, forming balls and rolling out easily. My pleating and pinching technique improved as I worked, and only the raspberry/ground walnut filling showed any signs of leakage later as the buns steamed. 


The second rise was nearly a non-event. I grew so impatient waiting for a doubling in size and finally moved on to steaming the buns. I rationalized "they are sweet dessert morsels, small will be just fine. Maybe they'll fluff and expand more as they steam... maybe... if I didn't rush them too early."


Mixed reviews on the fluff factor! The buns did increase in size as they cooked but never matched the desired light airiness of restaurant Bao. The texture was pleasant enough to enjoy whether served directly from the steamer or cooled and eaten hours later. 


Dark Chocolate Mint Morsels scored my vote for best chocolatey filling, sweet but masking any green tea or sourdough flavor.


Nutella with coconut shreds came in last place, somewhat flat tasting and definitely too sweet to play nicely with the flavors in the dough.


RL awarded top marks to the raspberry and ground walnut filling, but it had some disappointing leakage issues while steaming. 


I steamed the two remaining ping pong sized balls of dough without rolling and filling, an experiment to test the dough's texture and taste without the distraction of filling. At first bite a definite sourdough tang was apparent but I couldn't distinguish any green tea flavor. Evidently my DIY grinding of green tea leaves didn't come close to matching authentic matcha powder's taste or coloration. No problem, for consolation I ate the two unfilled buns with a bit of butter and quite enjoyed them. 


 Now I am looking forward to checking out the posts from other Sourdough Surprises Bao bakers. 


Green Tea Sourdough Steamed Buns

Dough Ingredients (for 10-12 small buns)

1/8 cup sugar
1/4 cup warm water
1/4 cup refreshed sourdough starter
1 medium egg, whisked to blend white & yolk
1 Tablespoon oil
1/2 teaspoon salt
1 Tablespoon Matcha powder (finely ground green tea leaves)
1 cup plus 2 generous tablespoons AP flour


Directions for the Buns:
  1. Place the sugar and warm water in a small bowl; mix until sugar dissolves. Add sourdough starter and whisk to incorporate.
  2. Sift flour into a larger bowl. Add starter mixture, egg, oil, salt and Matcha powder; stir to mix. Use your hands to bring the flour mixture together.
  3. Place dough on a lightly floured surface and knead for 10 minutes or until smooth and slightly elastic.
  4. Place in a lightly oiled bowl; cover with a damp cloth and leave to rise until doubled in size. This could take several hours to overnight depending on your starter. 
  5. Once dough has doubled in size, punch down and divide into 6 portions; shape into round balls.
  6. Use a rolling pin to roll a ball into a 2-inch disk. Then pick up the piece of dough and gently pull the edges to enlarge to a 3-inch diameter disk. The dough should be slightly thicker in the center.
  7. Place a heaping tablespoon of filling on the dough circle. Gather the edges and seal the bun.
  8. Place the bun, seal side down, on a baking tray atop a square of parchment paper. Cover with a cloth and continue with the rest of the dough. Let the buns rise until doubled in size. Remove the towel.
  9. Carefully place some of the buns (still resting on their parchment paper squares) in a steamer basket, positioning them several inches apart to allow for spreading.
  10. Place in a steamer for 10-15 minutes or until the dough is cooked through. 


Thursday, November 20, 2014

Sourdough Dinner Rolls


Last winter I played with several Quick Dinner Roll recipes, searching for one that might produce rolls to rival those of my mother-in-law. None matched the memory of Irene's light and airy rolls, so I'm still hunting for the perfect recipe. This month SourdoughSurprises chose dinner rolls as their baking challenge, providing me a welcome opportunity to check out successful recipes from other bakers as they post their results on individual blogs and on Pinterest. This group always produces amazing sourdough treasures.

Recent surgery has slowed down my culinary efforts lately, but it's time to get busy baking and cooking again. Soup has been a menu staple this month, helping to combat November's chilly weather, and nothing goes better with homemade soup than homemade rolls. Just the aroma of freshly baked bread adds warmth to the kitchen as well as smiles to my day. That said, I wasn't ready to attack heavy-duty kneading while still on crutches, so I returned to the search for a quick and easy dinner roll recipe, something I could do while seated. 

Rather than create a real 100% sourdough dinner roll, I added sourdough starter to an adapted version of Double-Quick Dinner Rolls found in a 1961 edition of Betty Crocker's New Picture Cook Book. Quick but not exactly "double-quick", the recipe did come together easily and produced buns that were quite acceptable. Though still not as tender and light as Irene's, these rolls were a definite improvement over my previous attempts. 


Perfect Quick Dinner Rolls are still a work in progress in my galley. Do you have a favorite recipe to recommend?


Double-Quick Dinner Rolls
makes 12-15 rolls

3/4 cup warm water
1/4 cup buttermilk
1 package active dry yeast (2 1/4 tsp.)
2 Tbsp. sugar
1/4 cup sourdough starter
2 1/4 cups AP flour, divided
1 tsp. salt
1 egg
3 Tbsp. butter, softened

*Optional: melted garlic butter & seasoned pepitas (toasted pumpkin seeds flavored with cayenne & garlic)

  1. Add the water and buttermilk to a large mixing bowl; sprinkle the yeast over the top and stir to dissolve.
  2. Add the sugar and sourdough starter and whisk until smooth.
  3. Sift the flour or measure with a scoop-level-pour method. Add half of the flour and the salt to the yeast mixture and beat until smooth.
  4. Add the egg and butter; beat in the rest of the flour until smooth.
  5. Scrape down the sides of the bowl, cover with a cloth and let rise in a warm place until double (about 40 minutes in my oven set for bread proofing, 100 degrees F).
  6. Grease large muffin cups. Stir down the raised dough and scoop or spoon into the muffin cups, filling them about half full. Let rise in a warm place until the dough reaches the tops of the muffin cups.
  7. *Optional: sprinkle seasoned pepitas over the tops of each roll before the second rise.
  8. Heat the oven to 400 degrees F. Bake on a center rack until lightly golden, 15 to 20 minutes.
  9. *Optional: brush the tops of the still-warm rolls with melted garlic butter for a flavor pop.


Note: #TwelveLoaves bakers chose pumpkin as their November challenge. A sprinkling of pepitas might qualify these dinner rolls as fitting their monthly theme, or maybe not. I don't eat pumpkin-flavored anything so these buns are as close as I'll come to baking with #TwelveLoaves this month. If you are a pumpkin fan, you'll want to check out their bread recipes for November.
#TwelveLoaves is a monthly bread baking party created by Lora from Cake Duchess and run with the help of Heather of girlichef, which runs smoothly with the help of our bakers.Our host this month is Renee from Kudos Kitchen by Renee, and our theme is Pumpkin. For more bread recipes, visit the #TwelveLoaves Pinterest board, or check out last month’s tempting selection of #TwelveLoaves Apple Breads! 


Thursday, March 20, 2014

Sourdough Soda Bread Biscuits...

...with orange zest, currants and a slight Sourdough twist. 


Soda Bread was the March project for Sourdough Surprises, a fun monthly group of bakers who strive to use sourdough starters for things besides bread. Since soda bread typically relies on baking soda for its rise rather than yeast, the added sourdough comes along for the ride as a flavoring ingredient only. In decades past my early attempts to make soda bread yielded bland, dense, dry loaves suitable for doorstops or boat anchors. I moved on to other loaves and never looked back, until this month's challenge put soda bread back on the menu.

An online search provided a gazillion choices (okay, over a quarter million). I selected a basic, non-sourdough recipe with few ingredients, then changed it... adjusted the flour and buttermilk quantities to account for some added sourdough starter... omitted the recommended caraway seeds... added orange zest to pop the flavor... and carried on with high hopes but low expectations. Small biscuits or loaves sounded somehow less risky than a full-blown loaf, less likely to break a toe if dropped, etc. 


Well hot damn, those little biscuits were delicious! They were moist, loose crumbed but not crumbly, and the orange zest and sourdough took the flavor w-a-y beyond bland. Why did I give up on soda bread so easily those many years ago?! 


Our St. Patrick's Day celebration menu featured Corned Beef baked with a mustard/orange marmalade glaze, Colcannon with Kale, Orange-sauced Carrots, Shamrock Cookies delivered by a local leprechaun, and surprisingly good Sourdough Soda Bread Biscuits. We all agreed, we shouldn't wait for the next St. Patrick's day to roll around in order to enjoy these biscuits again. 


Soda Bread Biscuits
based on a recipe from Food Network Magazine
yield: eight 3-inch biscuits

Prep Time:  10 minutes
Cook Time: 20 minutes
Dry ingredients:
1 3/4 cups AP flour
2 teaspoons sugar
3/4 teaspoons baking soda
1/2 teaspoon salt

Wet ingredients:
2 tablespoons cold butter, diced
1/2 cup currants or raising
zest of 1 orange
1/2 cup buttermilk (or 1/2 cup milk + 1 Tablespoon white vinegar)
1/2 cup sourdough starter

  1. Preheat the oven to 375 degrees F.
  2. Add the dry ingredients to the bowl of a food processor. Pulse a time or two to mix.
  3. Add the diced bits of cold butter to the bowl and pulse several times to incorporate.
  4. Add the raisins, fresh orange zest, buttermilk and sourdough starter to the bowl; pulse off and on until the dough comes together and begins to form a ball. 
  5. Don't get carried away and over pulse on any of the above steps - the dough is meant to be a bit wet, shaggy and sticky.
  6. Put the dough onto a lightly floured surface and pat it out evenly until it's about 1-inch thick. Use a floured biscuit cutter or a knife to cut it into 2 1/2 to 3-inch rounds.
  7. Place on a (silpat-covered) cookie sheet and bake at 375 degrees F for 15 to 20 minutes or until lightly browned.
  8. Best eaten warm the same day baked, or reheated in a bun steamer. Soda bread is not noted for it's keeping quality.


Thursday, February 20, 2014

Hidden Treasure Sourdough Pull Aparts


Background:
Sourdough Surprises' February baking challenge is Monkey Bread... Pull Apart Bread... typically a sweet dough item drenched with a sticky, ooey, gooey, buttery caramelized sugar syrup. Uh, no, thank you, I don't think so, not my thing, far too sweet. I procrastinated for days, pondering how to handle the challenge, and initially decided not to bake with the group this month. No, that would be a poor choice, a lazy way around the issue.

Phase One:
I decided instead to be ornery and ignore the whole uber sweet focus. I would bake a savory version of pull apart bread, a sourdough filled with slices of swiss cheese and ham and slathered with grainy honey mustard. Well, it was... interesting, perfectly adequate yet disappointing. The cheese melted away into the dough and the mustard flavoring underwhelmed my taste buds. I salvaged a few slabs of the not-so-cheesy bread and ham, added some greens and sliced tomatoes fillings, and called it a pull apart/put together sandwich. Meh, this was not working, certainly not worth sharing, and not in the spirit of this month's challenge. Sigh.  


Phase Two:
I veered back toward sweet, aiming for a modified, slightly less sweet version of the theme "sourdough monkey bread/pull apart bread". My plan was to add a distinctive flavor or two, subtract a ton of butter and sugar, and bake small bites in muffin tins instead of packing the dough balls into one large loaf pan or cake pan.

Each dough ball contained a few fresh blueberries - the "hidden treasure" of the title. A pinch of freshly-grated orange zest offered a pleasant tangy, citrusy balance to the sweet coating of sprinkled cinnamon, apple pie spice and sugar. I tried one straight from the oven... and broke into giggles. The sourdough pull apart rolls were just fine, really, but they did need a drizzle of oozy, gooey sweetness to round out the taste. So much for my "I prefer savory" stance! 

A quick microwaved cream cheese, orange marmalade and powdered sugar frosting drizzled over the top did the trick. These little frosted cuties turned out to be quite good, sweet but not cloyingly sweet. The orange zest contributed a pleasant back note, and the blueberries added some fun.   


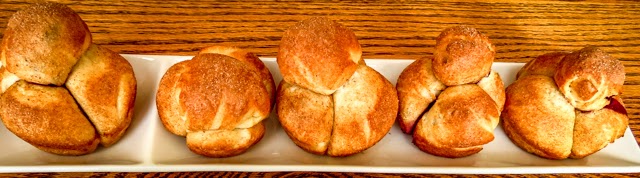
The muffin tin version were the perfect size for a mid-morning snack, much neater and easier to share than a larger loaf pan or bundt pan product. Note: despite the fork pictured above, I ate my share with my hands, pulling the dough balls apart and licking my fingers at the end. Now I have to eat my words - who said sweets weren't my thing?!


Hidden Treasure Sourdough Pull Aparts

Yield depends on the size and number of dough balls in each cup.

For the dough:
     1 cup sourdough starter, well-fed and proofed 
     1 1/2 tablespoon butter, melted
     1/4 cup milk, warmed
     1/2 cup AP flour
     1 egg, beaten
     1/4 teaspoon salt
     1/2 Tablespoon sugar   
     1 1/2 cups additional AP flour

For the coating:
1 teaspoon cinnamon
1 teaspoon apple pie spice
1 cup granulated sugar

Hidden Treasure:
Fresh blueberries
Grated zest of 1 large orange

Frosting:
2 tablespoons cream cheese
2 tablespoons orange marmalade
2/3 cup powdered sugar

For the dough:
Stir together the first 7 ingredients, starter through sugar. Add the additional 1 1/2 cups AP flour and knead until evenly combined (use more or less as needed to form a sticky dough that comes together and no longer clings to the side of the mixing bowl).
First Rise: Cover the bowl and let rise overnight (or at least for several hours until it doubles in size).
Form:
Use cooking spray or butter to grease Texas size muffin tins.
Punch down the dough, let rest 15-20 minutes, then roll out approximately 1/2-inch thick on a lightly floured surface. 
Scatter the orange zest over the top of the dough. Use a pizza cutter to slice the dough into squares. Top a dough square with a few blueberries, gather the corners to form a purse and shape into a ball. Roll in your hand to round the shape. 
Roll the dough ball in the sugar mix to coat lightly and place in the muffin tin. Repeat for three more dough balls, arranging all four loosely in the cup. Repeat  with the remaining squares. 
Second Rise:
Cover and let rise until doubled in size, approximately 2 1/2 hours in my kitchen.
Bake:
Place the filled muffin tins in a preheated 350 degree F oven and bake for 30 minutes or until lightly browned. Remove, drizzle with the frosting and serve warm.
Frosting:
Heat the cream cheese, marmalade and sifted powdered sugar in a microwave, stirring often, until melted and loose. This took 2 bursts  of 30-seconds each in my micro.


Monday, January 20, 2014

Sourdough Focaccia with Za'atar, Onions, Olives & Cheese


Focaccia and I are old friends and share a casual, anything-goes relationship over ingredient add-ins and toppings. Minty Focaccia with Lemon and Pine Nuts remains my favorite to date, but topping choices do tend to vary from one batch to the next. When SourdoughSurprises selected focaccia as this month's feature, I thought "Easy peasy, been there, done that." Hah! what a surprise to find I had no 100% sourdough focaccia recipes in my files. Zero... zippo... nada... none! Why not? because I usually add sourdough starter to the commercial yeast called for in conventional bread or pizza recipes for a faster, no-need-to-plan-days-ahead process. Okay, this was the perfect opportunity to dive right in and let the sourdough starter perform its magic.

A stroke of luck and A Google search led me to Sara's blog, Heartland Renaissance, and the recipe I worked with this month. Visit her site to check out the recipe and the directions. The two focaccia stories Sara includes in her post are worth reading even if you don't want the recipe. 

My starter was refreshed and ready to work but I wasn't, I procrastinated until late evening. So much for planning ahead! That extra time encouraged me to play with the recipe a tiny bit, adding a heaping teaspoon of Za'atar to the dough. A 9:30pm start meant either a thru-the-night baking session or inserting a delay in the process. I went for the delay, splitting the first rise into two portions; 1 hour in my 67 F kitchen, followed by a gentle folding of the dough and an 8-hour overnight stay at 40 F on a shelf in the garage. Back inside the warm kitchen the next morning the dough warmed up, was stretched in the pan and sat through it's second rise. Dimpled and topped with lightly caramelized onions, kalamata olives, shredded fresh Parmesan, more Za'atar and some coarse sea salt, this focaccia was ready to hit the oven.


Photo: Focaccia with toppings, ready to bake.
Photo: Just-baked Focaccia Cooling on Bakers Rack
The results: 
The crisp golden brown crust provided a satisfying crunch and the interior of the loaf was soft and chewy, though with a tighter crumb and less oven spring than expected. The loaf rose more than crackers or flatbread, but I had hoped for more loft. Hmmm, did that overnight delay impact the rise? did I forget the honey? was there a flour issue? did I stretch the dough too thin? I'll have to sort all that out next time, when I actually do plan ahead properly.


Photo: A Square of Onion & Olive Topped, Herb-flavored Focaccia 
While this focaccia loaf was a bit low-rise its sourdough tang came through beautifully, not too assertively sour but definitely there. RL nibbled on two squares, commented that he had eaten this before and would rather have real sourdough bread. Hmmm, that's an apples and oranges comparison with his favorite loaf. I enthusiastically ate more than two squares, at more than one sitting - just to do a thorough evaluation, you understand. 

Photo: Stacks of Focaccia Squares
     *Plain: the salty, flavorful toppings were so taste-forward the bread was overshadowed.
     *Split and buttered: not recommended, and this comes from someone who loves butter.
     *Dipped in olive oil: yes! and next time add some balsamic vinegar to the EVOO.
     *Split and spread with Fig Preserves: my absolute favorite bite, and I will definitely enjoy this combo again.
     *Split and used to hold a soppresata & cheese sandwich: delicious, of course! 

Photo: Focaccia with Fig Preserves

Isn't it amazing what flour, water, olive oil, honey and salt can produce when combined with sourdough yeasties?! Now I can't wait to enjoy more focaccia recipes from other Sourdough Surprises bakers.
  

Friday, December 20, 2013

Sourdough Popovers with Bacon, Cheddar, Chiles and Corn

- a savory SouthWest version of the classic.


Sourdough Surprises selected popovers as the December 2013 baking challenge. Sourdough and Popovers? This was a surprising pairing. I hadn't baked or even thought about popovers in ages, and certainly never with sourdough starter in the ingredient mix. This would be "interesting".

A King Arthur Flour recipe was referenced but my inspiration came from two other sources; an online post here followed by a recipe in my local food co-op newsletter. Both offered a different take on savory popovers packed full of southwest flavors. Oh yes, these recipes called my name. It is impossible to resist bacon, cheese and chiles in anything. 


The results were surprising, definitely tasty but not quite what I had expected. These were not the everyday popovers I had attempted before, those towering, airy wonders that totally collapsed as they exited the oven. No, this sourdough variation delivered less puff and more egg, resembling a light, savory custardlike pudding encased in a thin-shelled pastry. 


I sampled one bite of the outer crust and then nibbled the soft, flavor-packed center. Forget the fork, I pulled the remaining crust apart and ate it with my fingers... every crumb... piece by piece. Mmmmm, I loved that delicate, crispy edge. Recovering my manners I returned to the fork to finish the moist center of that first popover, and then ate a second one. Even RL, not usually an egg enthusiast, enjoyed two popovers. 


Lighter than a quiche or frittata, but more dense than a traditional popover, this Loaded SW Popover was a new crossover wonder. Thanks for the popover challenge, Sourdough Surprises.


Loaded SouthWestern Sourdough Popovers 

based on a recipe from PCC Chef Lynne Vea (link)
makes 12 regular-muffin-size or 6 Texas-size popovers

3 strips bacon, finely chopped (or cooked whole, then crumbled)
1 cup white sweet corn, fresh or frozen
3 eggs, lightly beaten
1 scant cup milk
1/2 cup sourdough starter
1 cup minus 2 tablespoons unbleached AP white flour 
2 tablespoons fine grind white cornmeal
1/2 teaspoon salt
1 teaspoon sugar
Freshly ground black pepper, to taste
2 tablespoons melted butter
3/4 cup grated (not shredded) sharp white cheddar cheese
2 chopped green onions, both green and white parts
2 tablespoons diced chiles (canned or fresh, adding more or less as you like), tossed with a light sprinkle of flour to keep them clumping and diving directly to the bottom of the muffin cups.

Move a baking shelf to the bottom third of the oven. Preheat the oven to 425 F. 

Cook the bacon in a heavy skillet until crisp. Remove from the pan, drain and set aside, saving the drippings. (It's easiest to fry up whole or half slices, then crumble after cooking and cooling.)

Mix the dry ingredients (flour, cornmeal, salt, sugar and pepper) in a small bowl. Set aside. (I sifted them through a sieve, an optional exercise.) 

Place the corn in a second, larger mixing bowl. Add the beaten eggs,  milk, and sourdough starter; blend well. 

Add the dry mixture to the wet mixture and stir to combine. Add the melted butter and mix. Fold in (fold in, not whisk in or beat in) the bacon, cheddar, chives and floured chiles. 

Use 2 muffin tins and plan to fill alternate cups with batter. Place 1/4 to 1/2 teaspoon bacon drippings in the bottom of alternate muffin cups. Place in the preheated oven to warm for 3 minutes (any longer and you'll have smoke alarm issues). Remove and quickly pour the popover batter over the heated bacon drippings in those cups, filling about 3/4 full. (Optional suggestion found online: Pour a little hot water, less than an inch, into each empty muffin cup to avoid warping the pan.) Bake until puffed and a dark golden color, approximately 15-20 minutes for regular size and 20-30 minutes for Texas size.

Remove from the oven and place on a baking rack to cool for a minute or two. Run a butter knife around the edge of each popover to loosen, tilt in muffin cup or remove to a backing rack for a few minutes to set up a bit. Serve when still quite warm.

Cook's Note: Next time I will try using a blender, whizzing up half of the onions and chiles with the wet ingredients and stirring in the rest by hand.   

Wednesday, November 20, 2013

Cream Cheese Kolacky

for Sourdough Surprises: November 2013


Kolacky, kolachy or kolache mean different baked goods in different cultures. Some are sweet, some savory, some have a yeast-based dough, others feature a cream cheese and butter base. When Sourdough Surprises announced Kolache, a soft pastry that is typically filled with sweetned cheese or fruit, as the November theme, I cheered and turned to a well-worn, 3"x5" card, handwritten by my Austrian-born mother long ago when I was a newlywed. Mom's recipe came from her mother, though it's origin before then is uncertain. 


Some food memories recall special moments and family traditions, and these Kolacky do that for me. Kolacky, along with Apfelstrudel , Kupferlin (Viennese Almond Crescents),fruit and nut-filled Austrian coffee cakes and Mom's secret weapon Applesauce Rum Cake have graced the table at decades of Christmas celebrations and birthday parties, as much a part of the festivities as the people who enjoy them. Four generations of our family have relished these treats over the years, but this was the first batch to alter the traditional recipe and incorporate sourdough starter. I won't tell Mom if you don't. 


This dough holds no salt and no sugar, but they aren't missed. The sweet fillings don't require any flavor boost from the dough. Any hint of the typical sourdough tang was not discernible, but the starter seemed to react with the baking powder and lighten the dough a bit... maybe. Whatever, the end result made it worth all of my fussing and fiddling with the troublesome dough to form each cookie-like pastry  


Troublesome? Oh yes! this dough is notorious for changing from too cold and hard to roll almost instantly into too warm and sticky to handle. Rolling chilled dough between two sheets of plastic wrap solved the rolling problem, but filling and forming called for fast action. Pinching the diagonal corners seemed easy enough, but too many of them unfolded during the final 4 or 5 minutes of baking as the dough puffed. 


Pinching all 4 corners and securing with a toothpick was one solution, though it did produce an unusual-looking kolacky. No matter, sprinkled with powdered sugar these square bundles disappeared as quickly as the others with more traditional shapes.


Kolacky are bite-sized treats, so light it's easy to eat half a dozen or more before you realize what you've done. The plate below holds roughly half of today's single batch - all that I could rescue for a photo before enthusiastic tasters reached for "just one more".


Kolacky with Cream Cheese Dough  
(from the family recipe, today's notes in red)
approx 6 dozen cookies

1 8-ounce package cream cheese, at room temperature
1/2  pound butter (2 sticks), at room temperature
2 generous cups AP flour (rounded to account for the liquid in the starter)
1/4 cup well-fed sourdough starter (not in the traditional recipe)
1/2 teaspoon Baking Powder
plus your favorite fruit filling*
powdered sugar to dust over the baked cookies

Directions
  1. Cream together the cream cheese and butter in the bowl of a stand mixer. (Add the sourdough starter and mix briefly.)
  2. Sift together the flour and baking powder and add to the cream cheese mixture. Mix just until the dough comes together.
  3. Divide the dough into 6 equal portions, form into disks and wrap each separately in plastic wrap. Chill in the refrigerator for several hours or overnight. (Don't skip this step, you'll thank me later.)
  4. Working with one dough disk at a time, keeping the others in the fridge, roll out very thin between two sheets of plastic wrap. Cut into 2-inch squares. Put a small amount of filling in the center of each square. (Don't overfill, it will run out while it bakes.) Press 2 diagonal corners together and place on a silpat or prepared cookie sheet. Repeat for remaining dough.
  5. Bake at 350 degrees F for 10-12 minutes or until lightly browned. Rotate position midway through baking, avoid over-browning. Remove to a baking rack and dust with powdered sugar.
  6. Best eaten the same day, but they will hold for several days stored in the fridge in a covered container. 
*Today's Fillings
 - my homemade Spicy Italian Plum Jam
 - Bonne Maman's Fig Jam, plus a handful of pignoli (pine nuts)
 - Bonne Maman's Apricot Preserve

Mom's fillings
 - canned Solo or Wilderness brand filling (apricot, poppy seed and 
almond are favorites)
 - homegrown apricot jam, whizzed up in the blender
 - storebought apricot or strawberry jam with orange or lemon extract added for extra tartness to tame the sweet


Related Posts Plugin for WordPress, Blogger...